How to Build a Lightsaber
Feb 4, 2022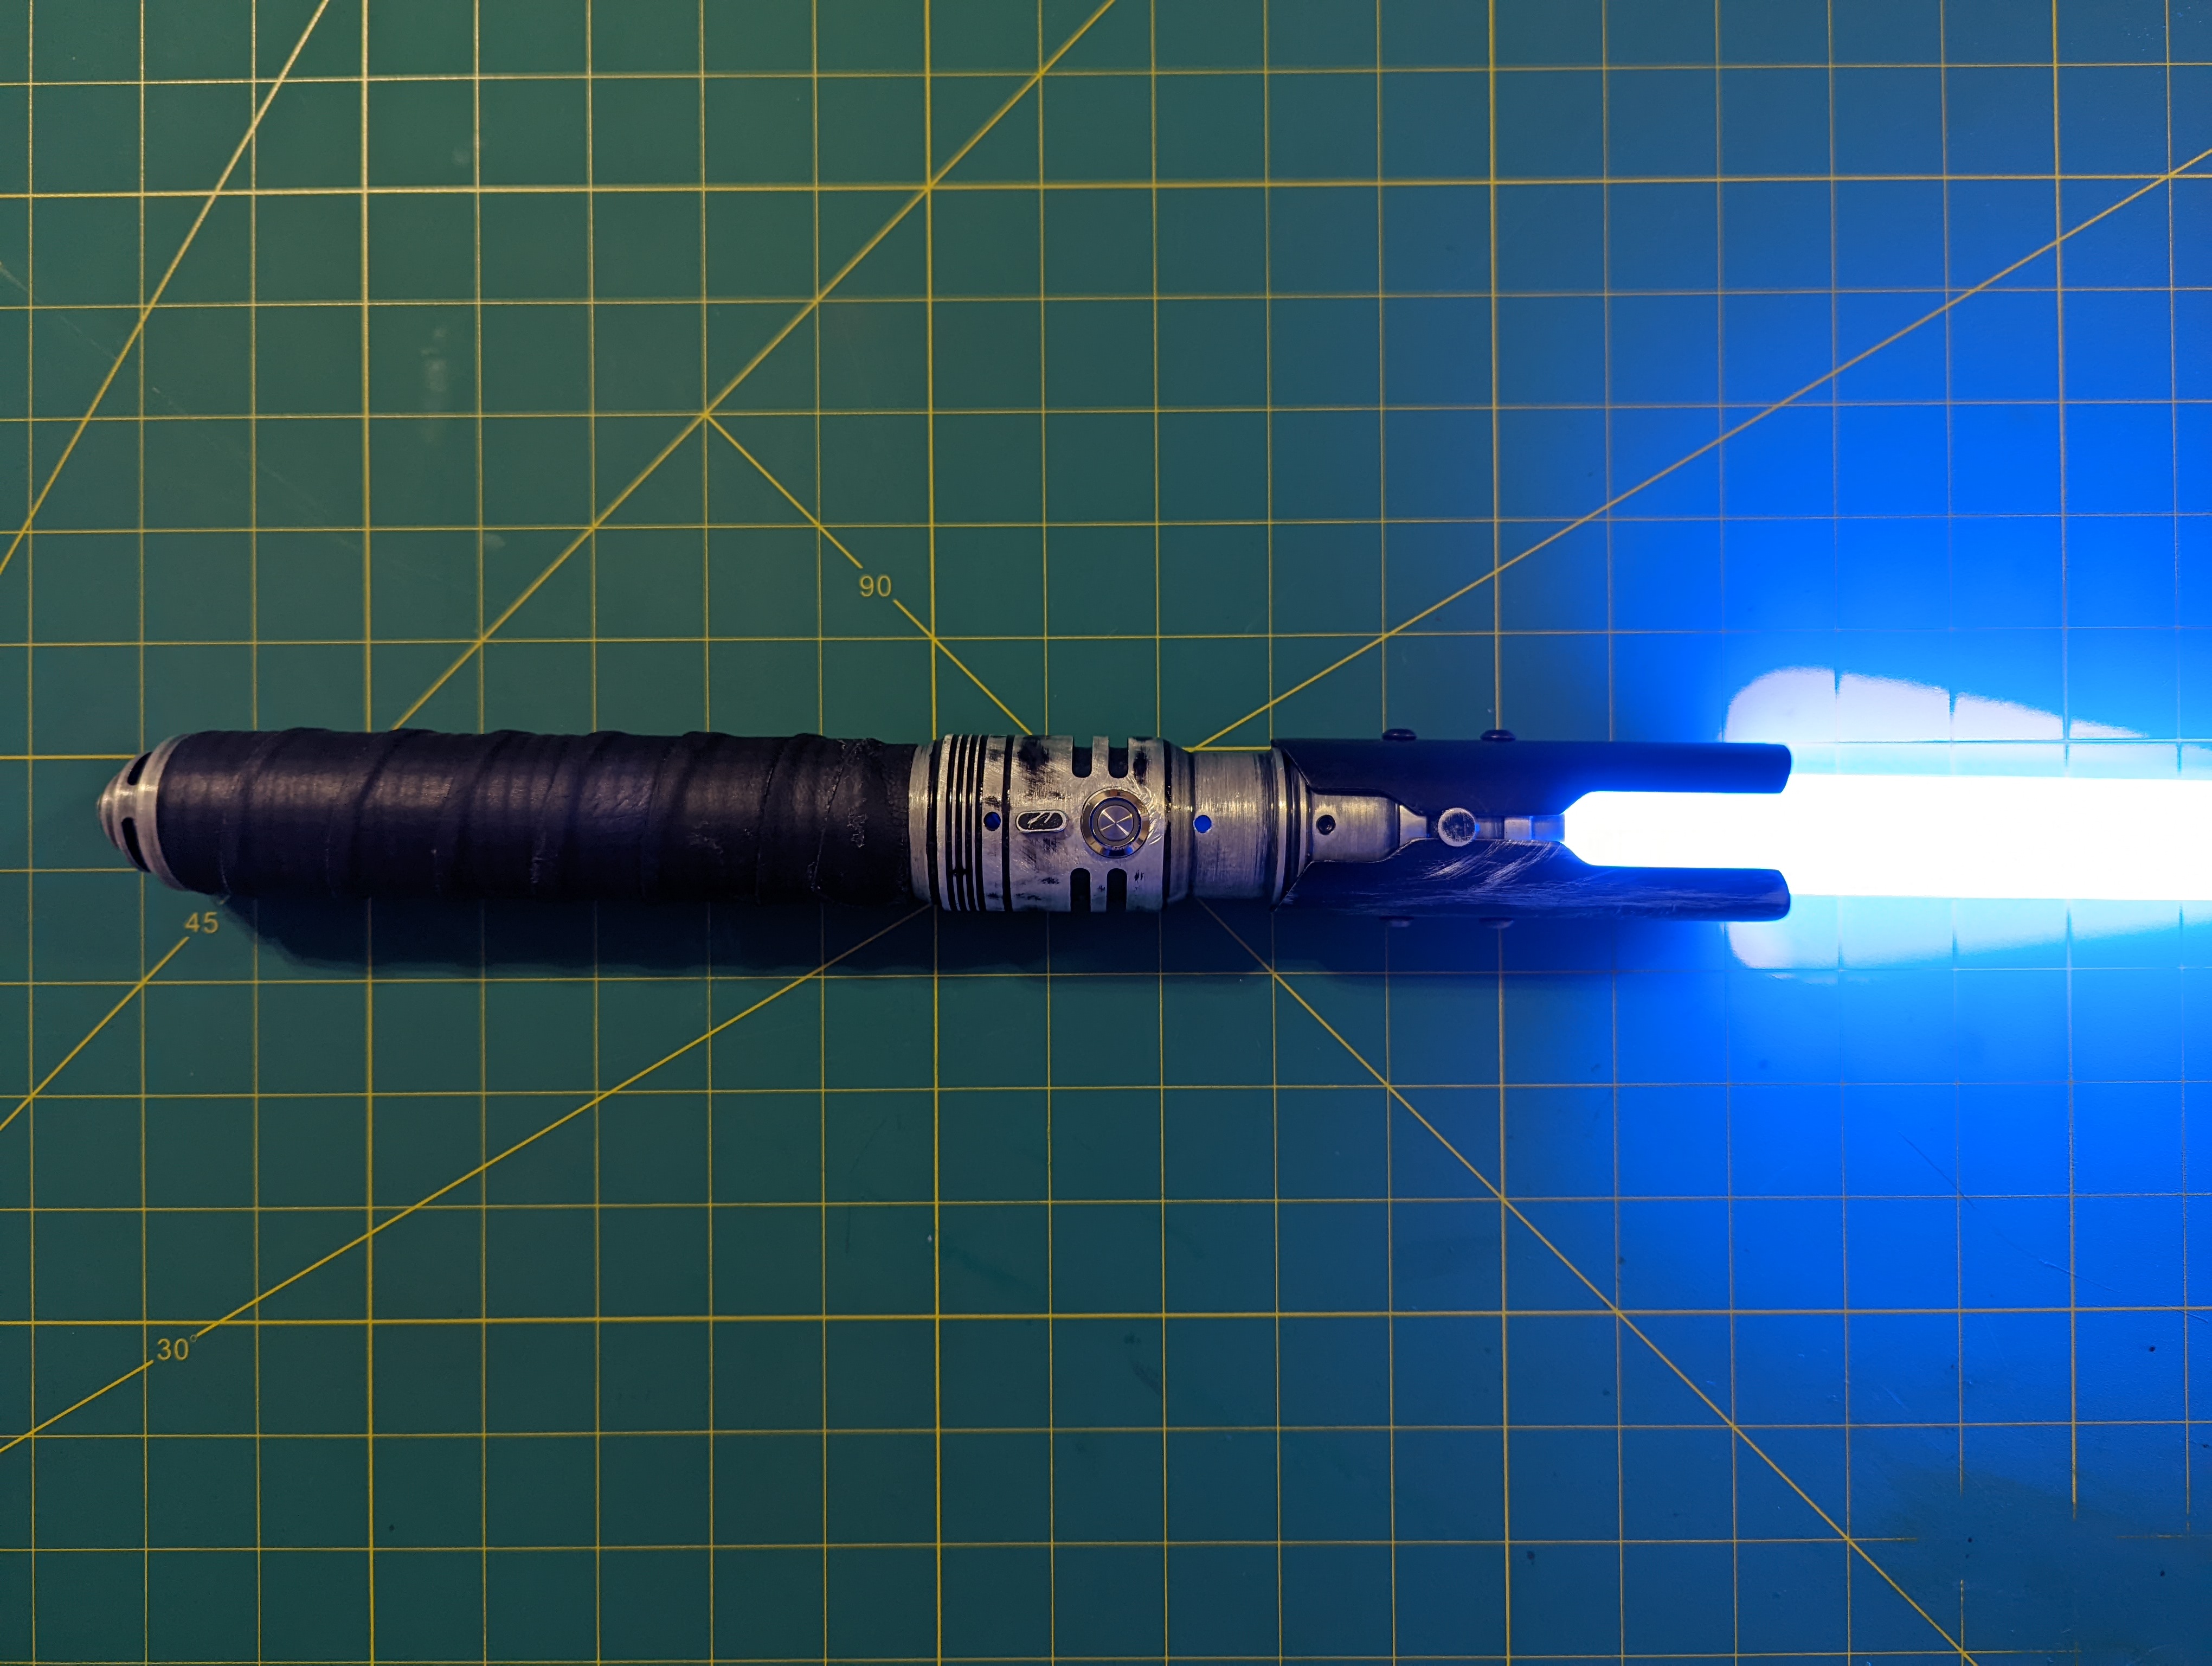
“This is the weapon of a Jedi Knight. Not as clumsy or as random as a blaster, but an elegant weapon for a more civilized age.” - Obi-Wan Kenobi
It’s probably the dream of every child who’s watched Star Wars to have a lightsaber of their own. I’ve certainly owned more than a few. When I found out about Saber Guild, a Star Wars costuming group that does lightsaber choreography for charity, that dream ignited again.
If you start searching the web for information about “combat” lightsabers, you can quickly be inundated with a ton of terms, sites, and information that can be overwhelming. So my goal here it to share what I’ve learned about lightsabers in general, and then the specifics of my build (especially what I’ve learned the hard way). So without further ado…
“You must unlearn what you have learned”
I found the r/lightsaber subreddit wiki to be a pretty useful resource. But to consolidate things, here are the most important considerations when choosing a saber:
- How are you going to use it? Will you be hitting other things a lot? Is it mostly for show?
- In-blade lighting (Neopixel is a common version of this) is very bright and can light up different colors. But, if you plan on hitting things, bare in mind you are essentially hitting your (breakable) LEDs each time
- In-hilt LEDs may have trouble lighting up a long blade (though this can be combated by getting boards with multiple LEDs), but are also much less fragile.
- And in general, bare in mind, things with nice paint or little details are more likely to be damaged if hitting things
- What features do you want? Sound? Color changing lights?
- The saber community uses microcontrollers called “soundboards” that can have a variety of features, including custom sounds, control lighting on impact (called “flash on clash”), changing light colors, etc
- Most will use “sound fonts”, which include sound effects for things like the saber turning on, hitting something, and waving around. Usually multiple of these can be loaded on an SD card stored in the sound board. Speakers of course will be needed for these
- There are both in-hilt and in-blade LEDs that can support changing colors as well as some things like flash on clash
- You can use “chassis” to contain most the electronics in the saber so they don’t bounce around. But they are often pretty specific to a hilt
- But again, the more things you put into a hilt (and those can be expensive things), the more that can break
- Are you interested or able to DIY anything? Electronics? Painting? etc
- You can have lots of fun customizing the look of a hilt with paint and weathering, even if you just buy an off the shelf saber
- For a simple set of electronics, wiring them can be simple, even for someone new to soldering. However, getting everything in the size of a hilt is a challenge. So keep that in mind
- There are tons of different shops selling pieces for DIY, so you will have options. But be prepared to encounter shipping and stock issues, as items are pretty niche
- If you are thinking of DIY to save money, please budget things out, including equipment you might need. I ended up DIYing it and most definitely did not save money on the electronics
- And of course, what is your budget?
- Basic sabers can cost as low as $100, ones with fancy functionality can cost $300 or much more, and super custom artisan sabers can be upwards of thousands
“You’ve taken your first step into a larger world”
For my purposes, I actually wanted to go all out with a Proffieboard, not just because it’s got all the shiny bells and whistles, but because it’s also open source (which I am also a big fan of)! But shipping nonsense persuaded me to go with a basic “stunt saber”. Which makes much more sense, both for my intended of purpose of (lightly) hitting things and for my lightsaber building experience level. I also wanted to make it myself, in part to know how to fix it if things went wrong and because I enjoy the sense of ownership you get of making something yourself.
I spent a while looking through post on the lightsabers subreddit trying to get ideas. I was looking for both artistic inspiration and also for information on what kind of parts to buy for a particular hilt, since I knew space constraints would limit my options. u/SPHINX-74 had a series of posts that helped with both goals (so thank you very much)!
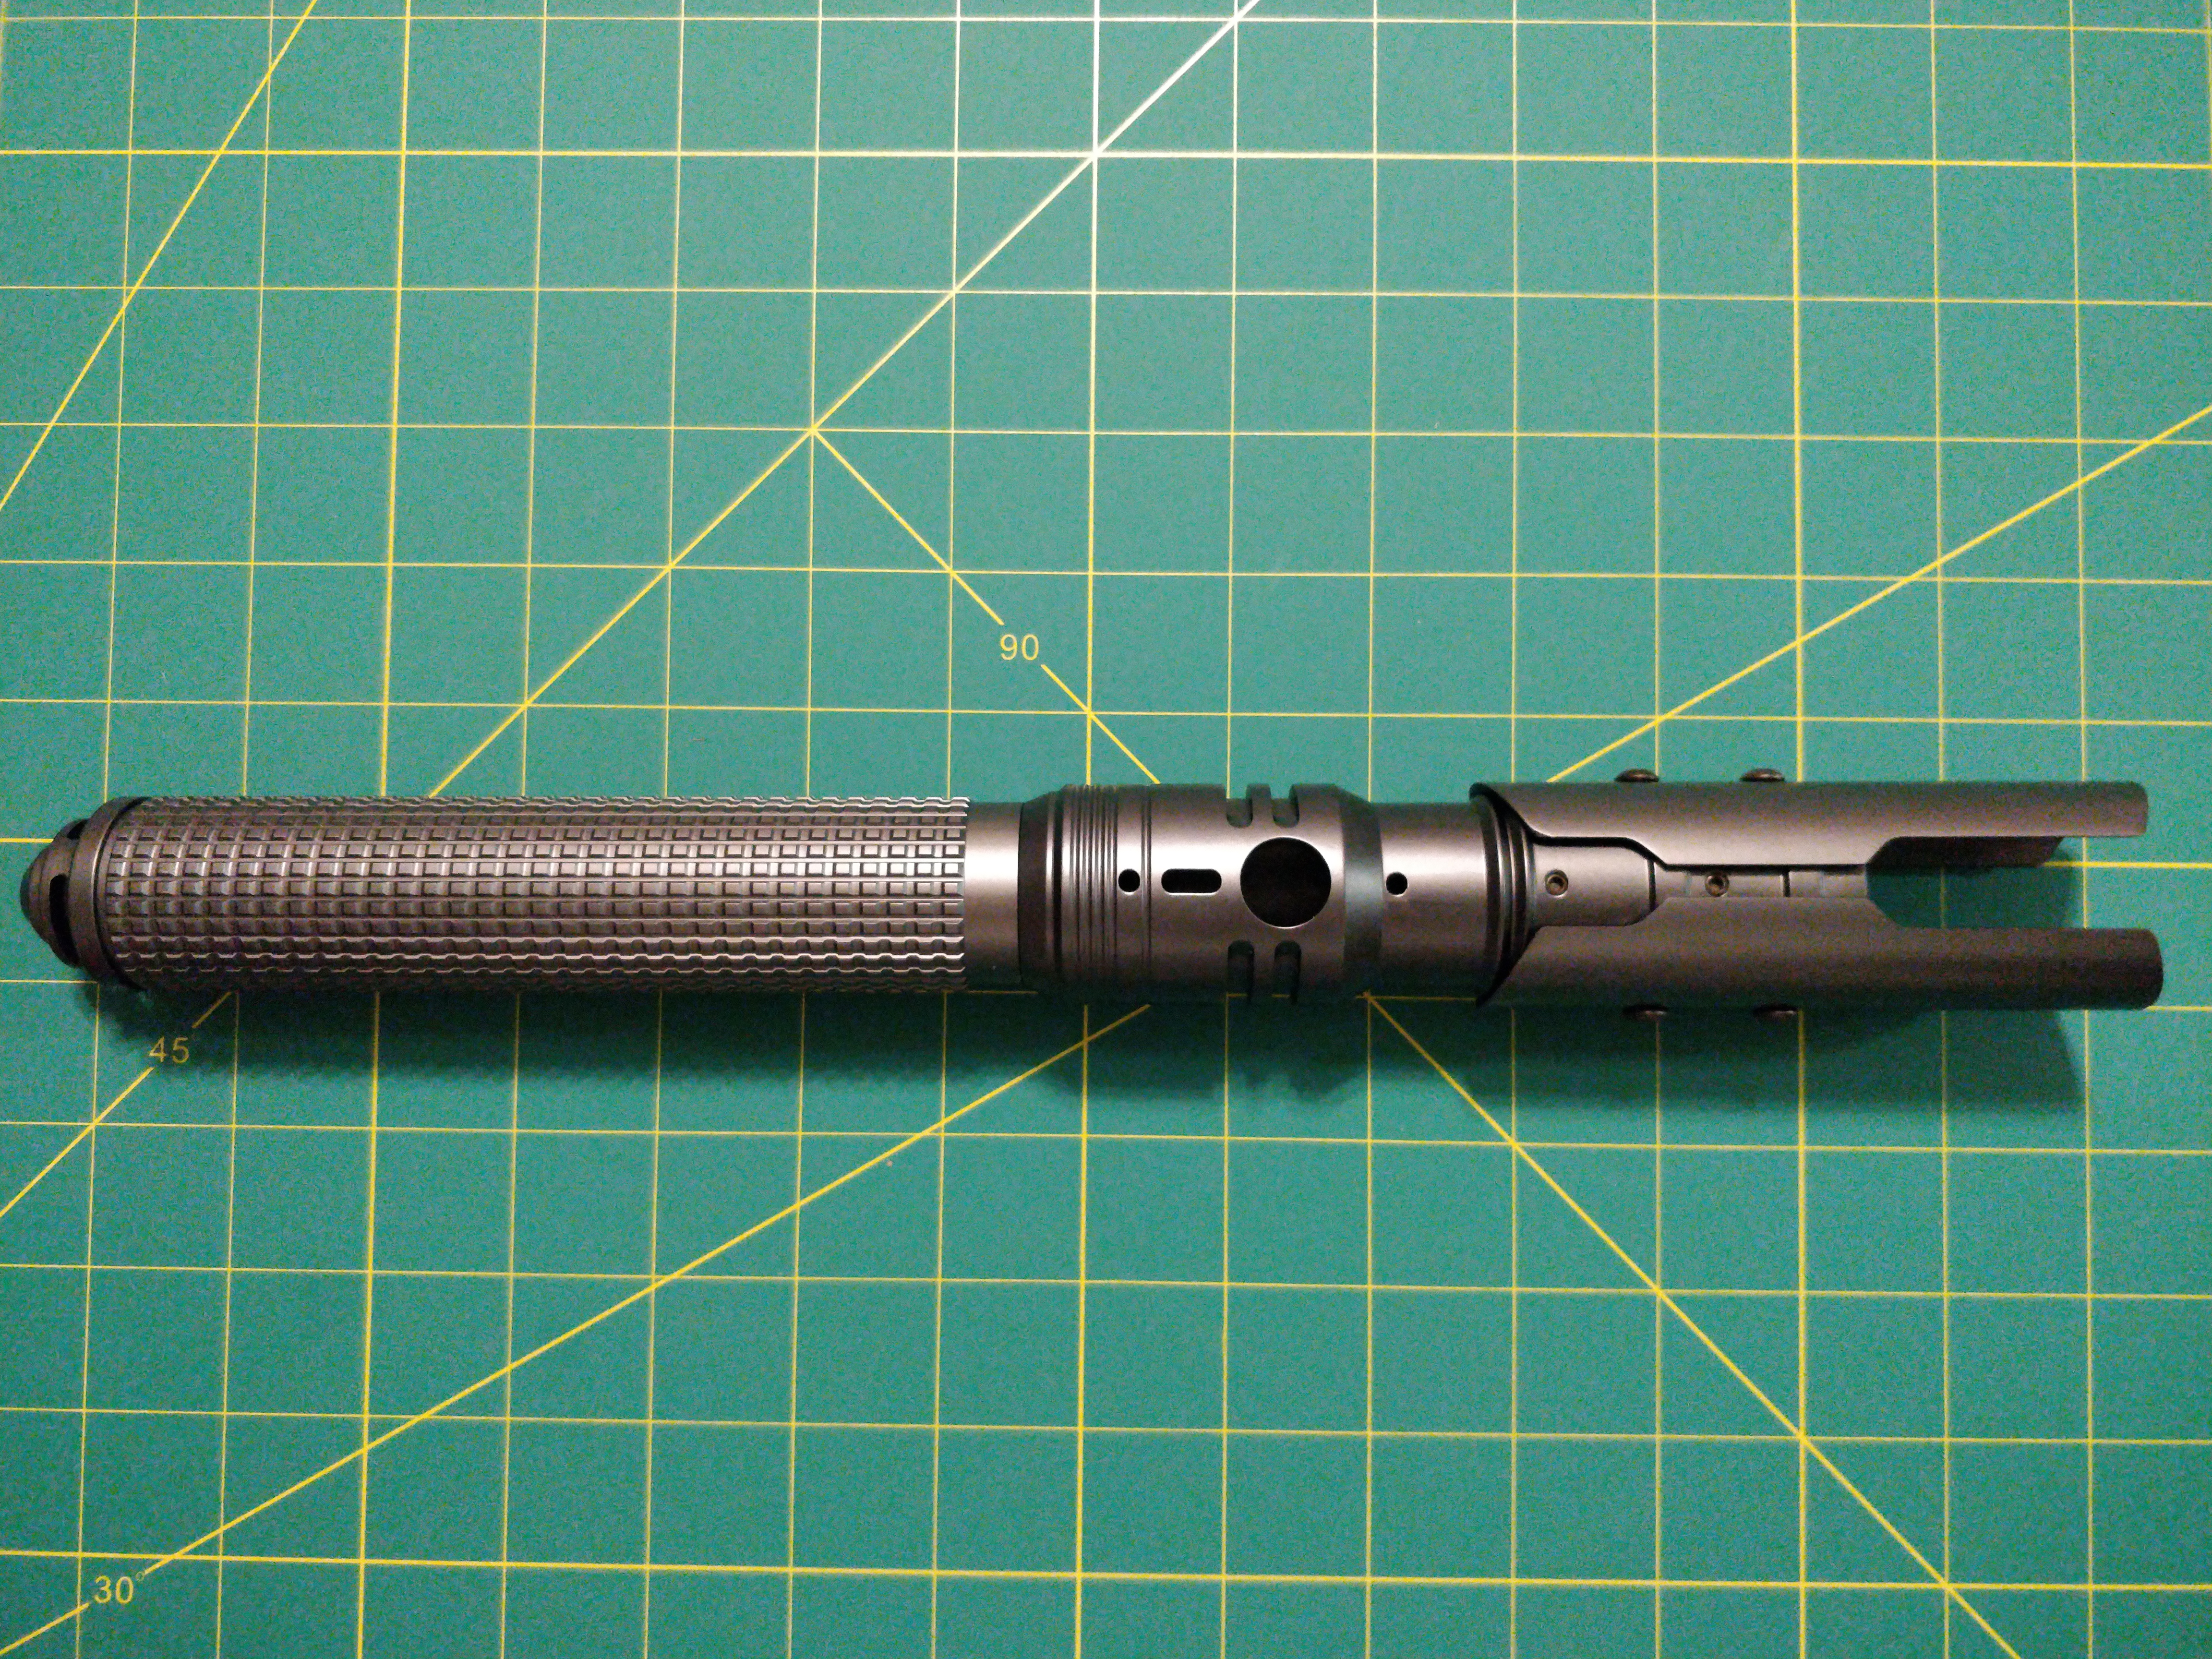
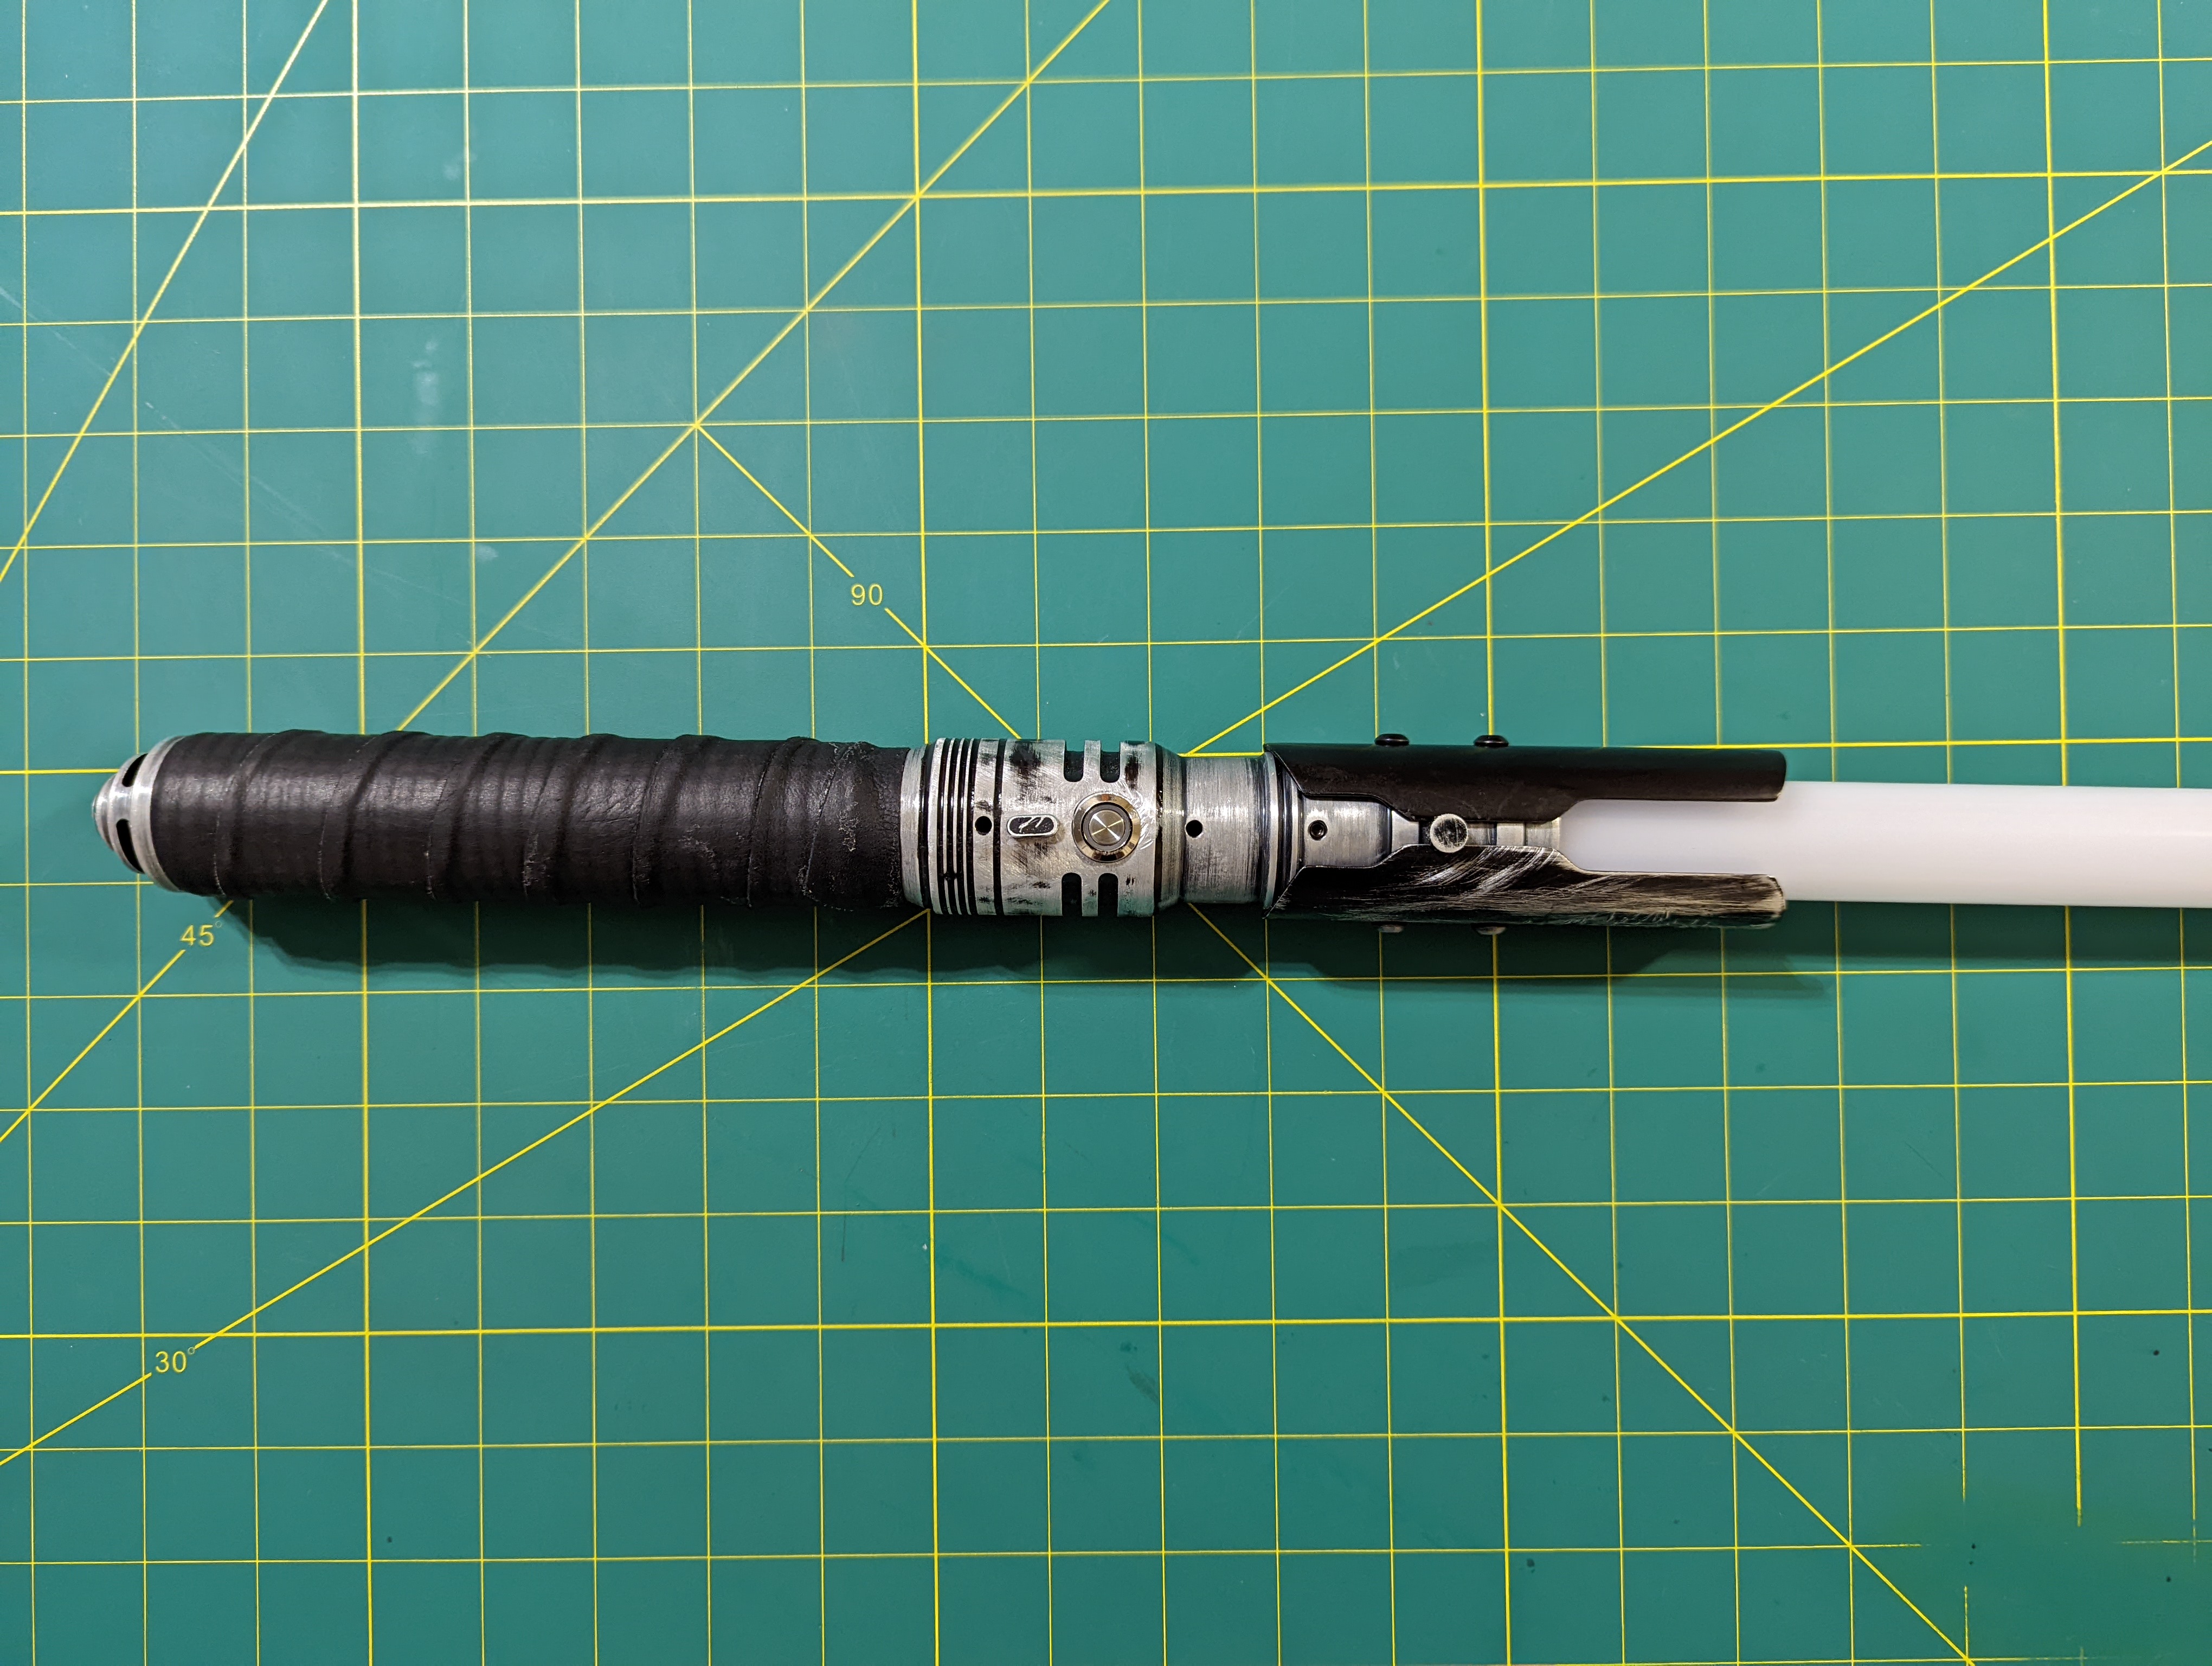
So I ordered a bunch of parts (more info on each below) and got to work sanding down the hilt. And oh my, there was a lot of sanding. My initial goal was to get a very clean and polished looking saber, like SPHINX-74’s. But as I went I realized I really liked the weathered appearance. Not only was it aesthetically pleasing, but I figured it was also a great way to hand wave any “imperfections” I encountered along the way. I could also use that to help build out the Jedi character I am making for Saber Guild. As of now, I like the idea they are really forgetful and “misplaced” their previous lightsaber. This would be the one they either found digging through old rooms in the Jedi Temple or that their master reluctantly gave them.
Here are the steps I took:
- Wait for things to show up
- Use 120, 220, 320 grit sand paper to remove paint from parts of the saber. Leaving it in around places dirt and grime would stick around
- Also used lithium grease on all the threading to protect it and make taking the saber apart much more audibly pleasant
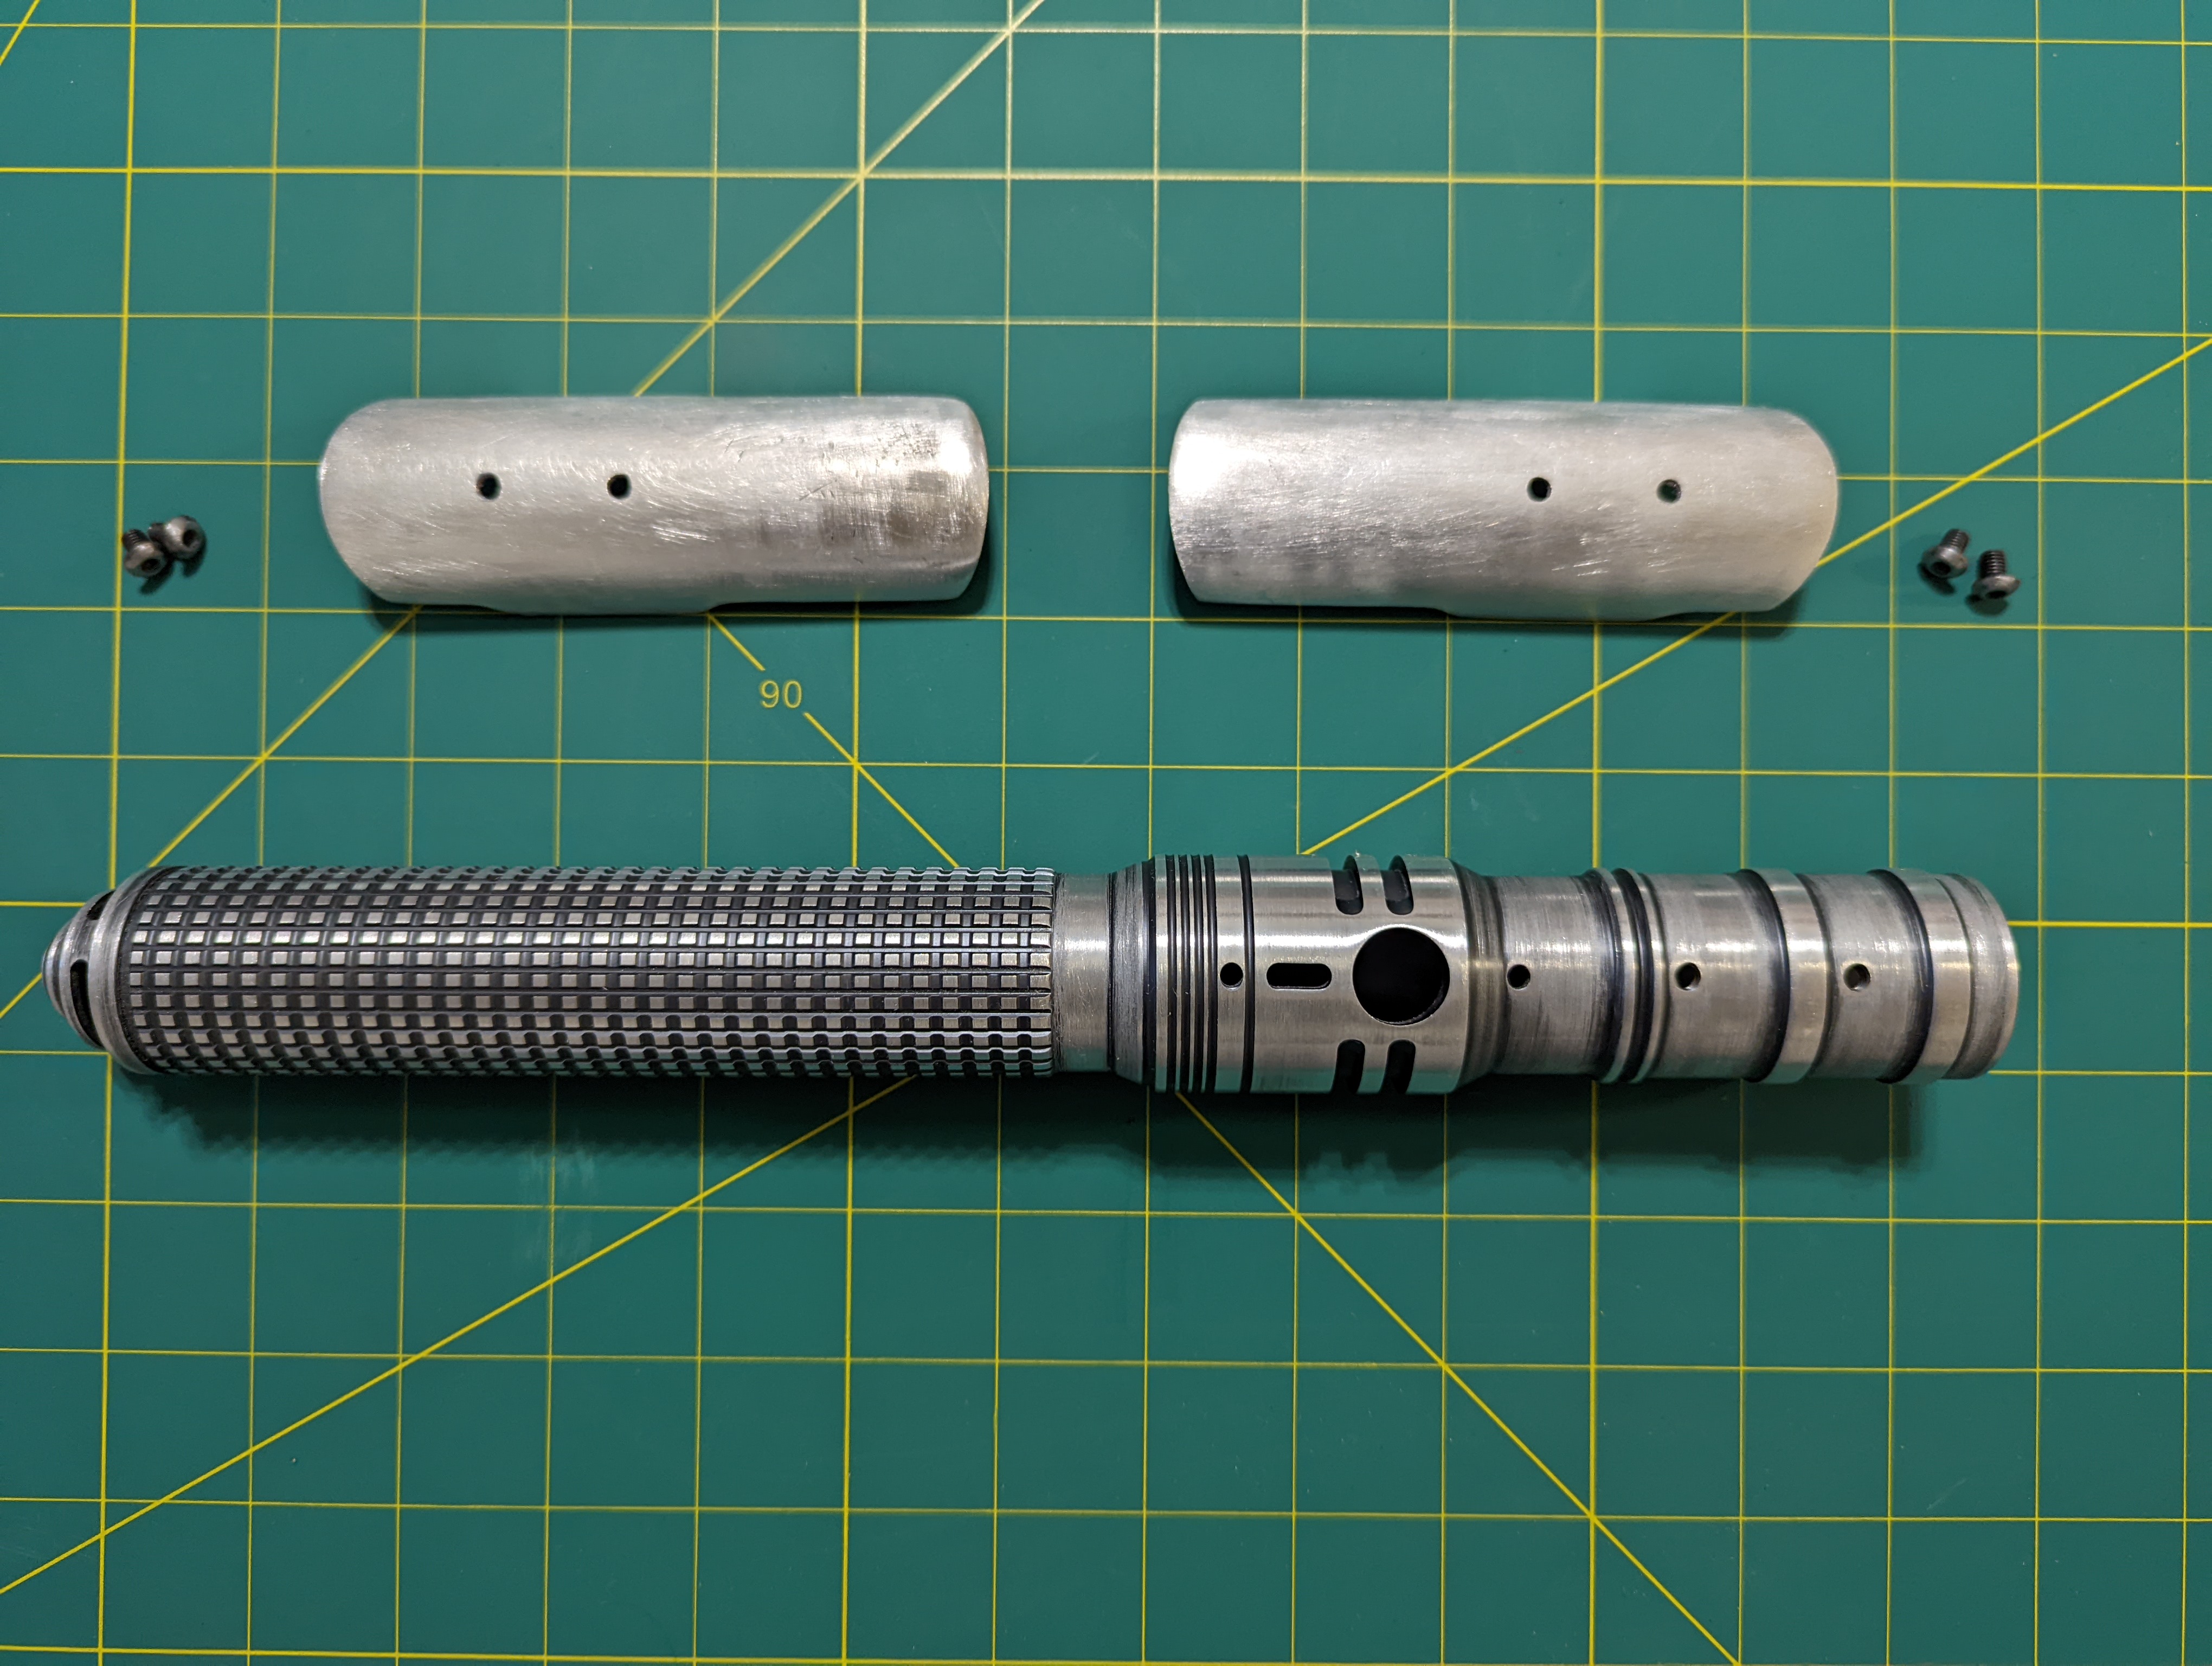
- Whoops, accidentally removed to much paint from the button area and the “ears”
- Get black spray paint and do a few layers on each of the areas I removed to much paint
- I discovered electric tape is an adequate alternative to painters tape if you’re without
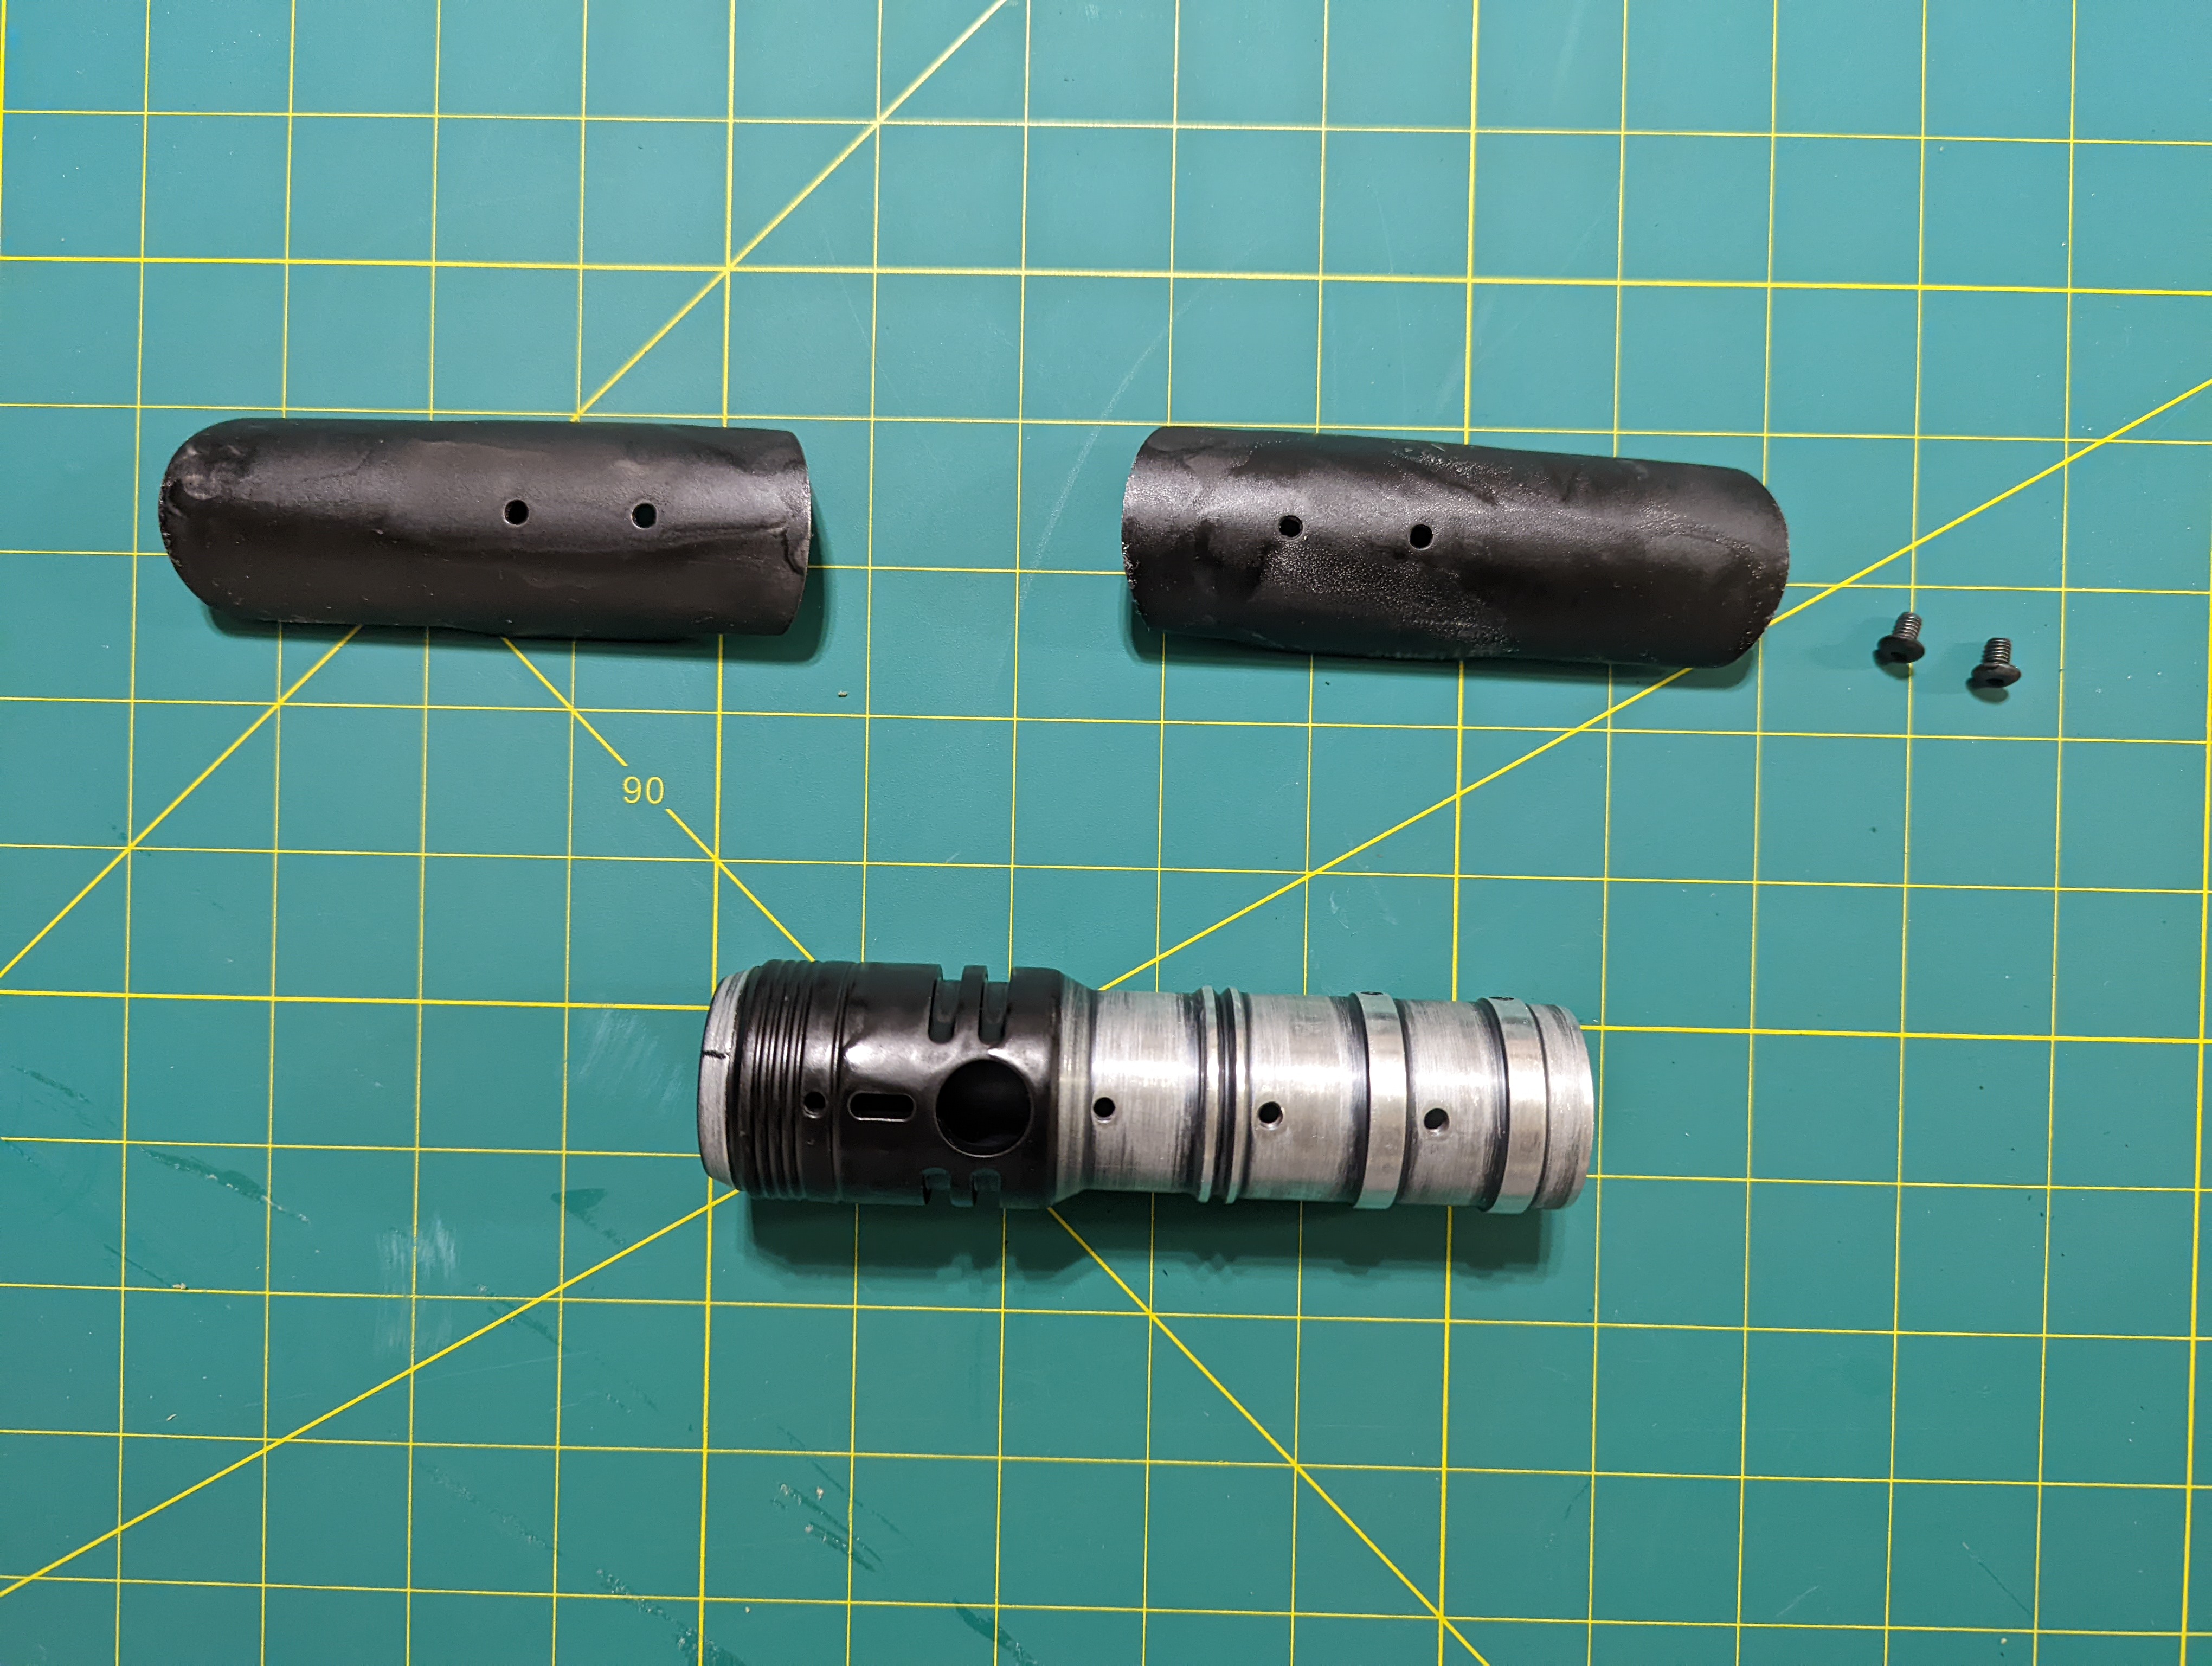
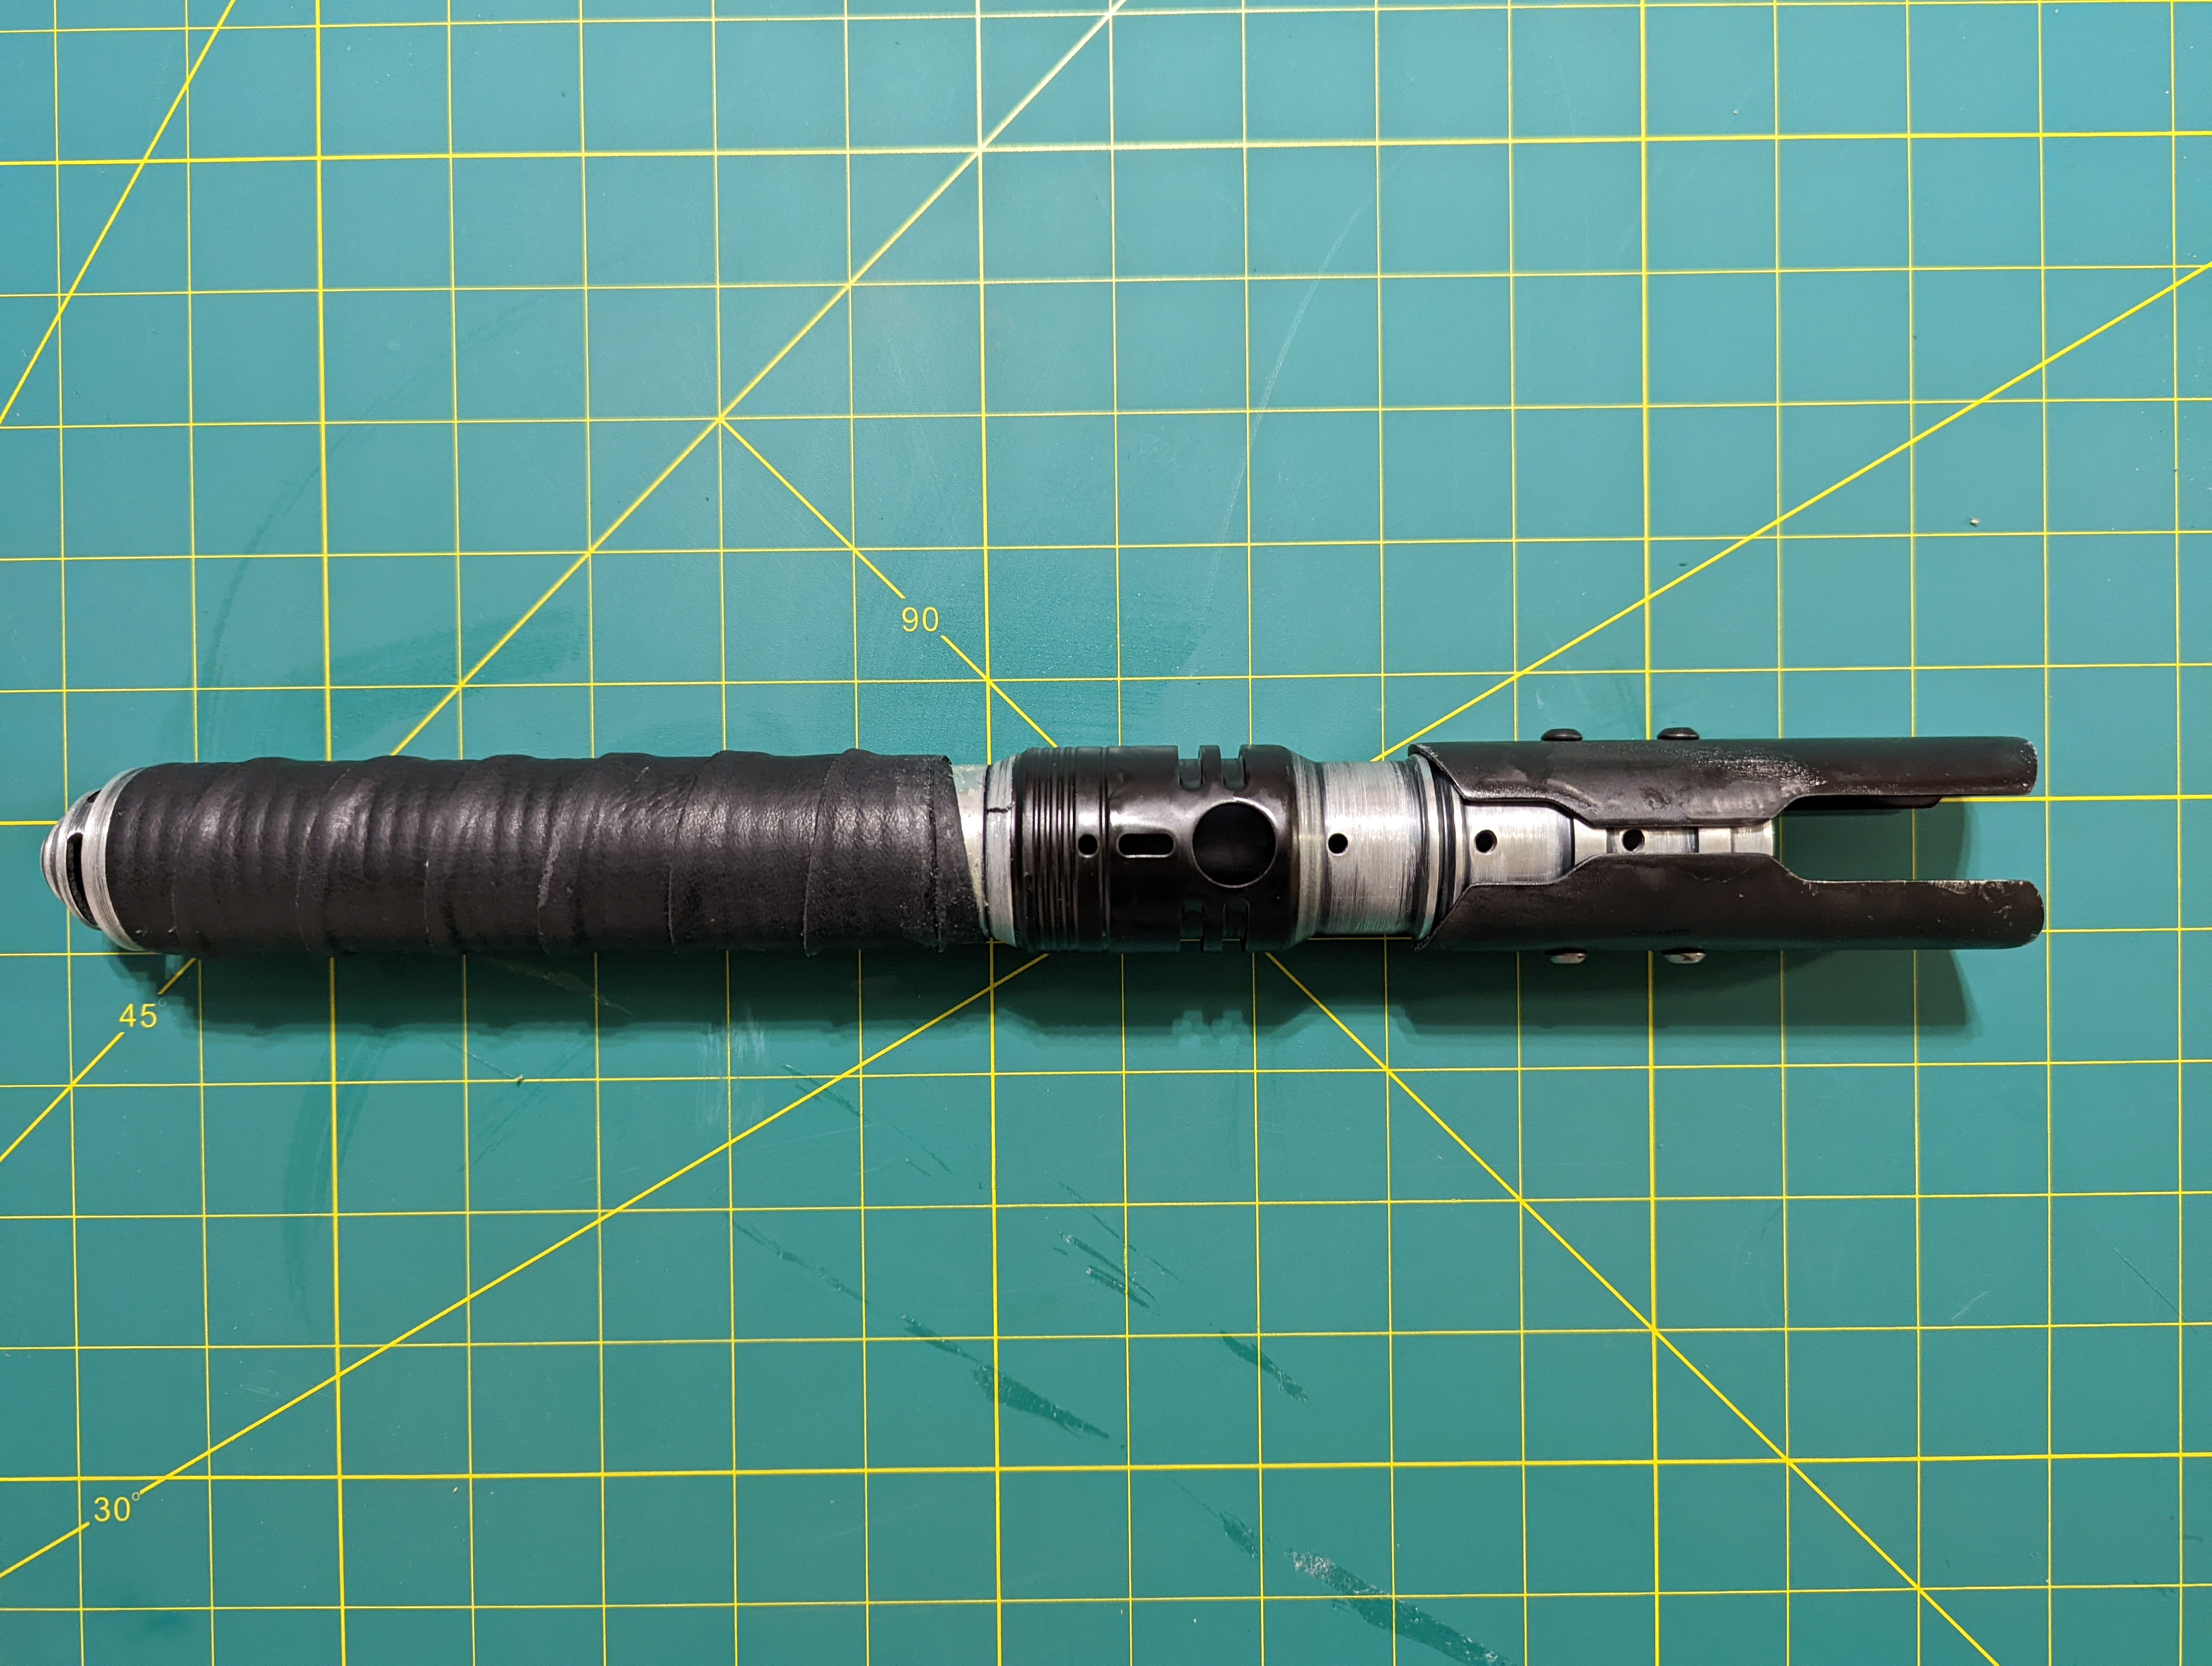
- Sand them again, but more carefully with 400 and 600 grit
- I also decided to keep one of the ears unweathered. I like the idea it was a new part used to replace the original
- Use both sides of a hammer to add battle damage to hilt, particular the weathered ear
- I then did a clear coat to protect the weathering
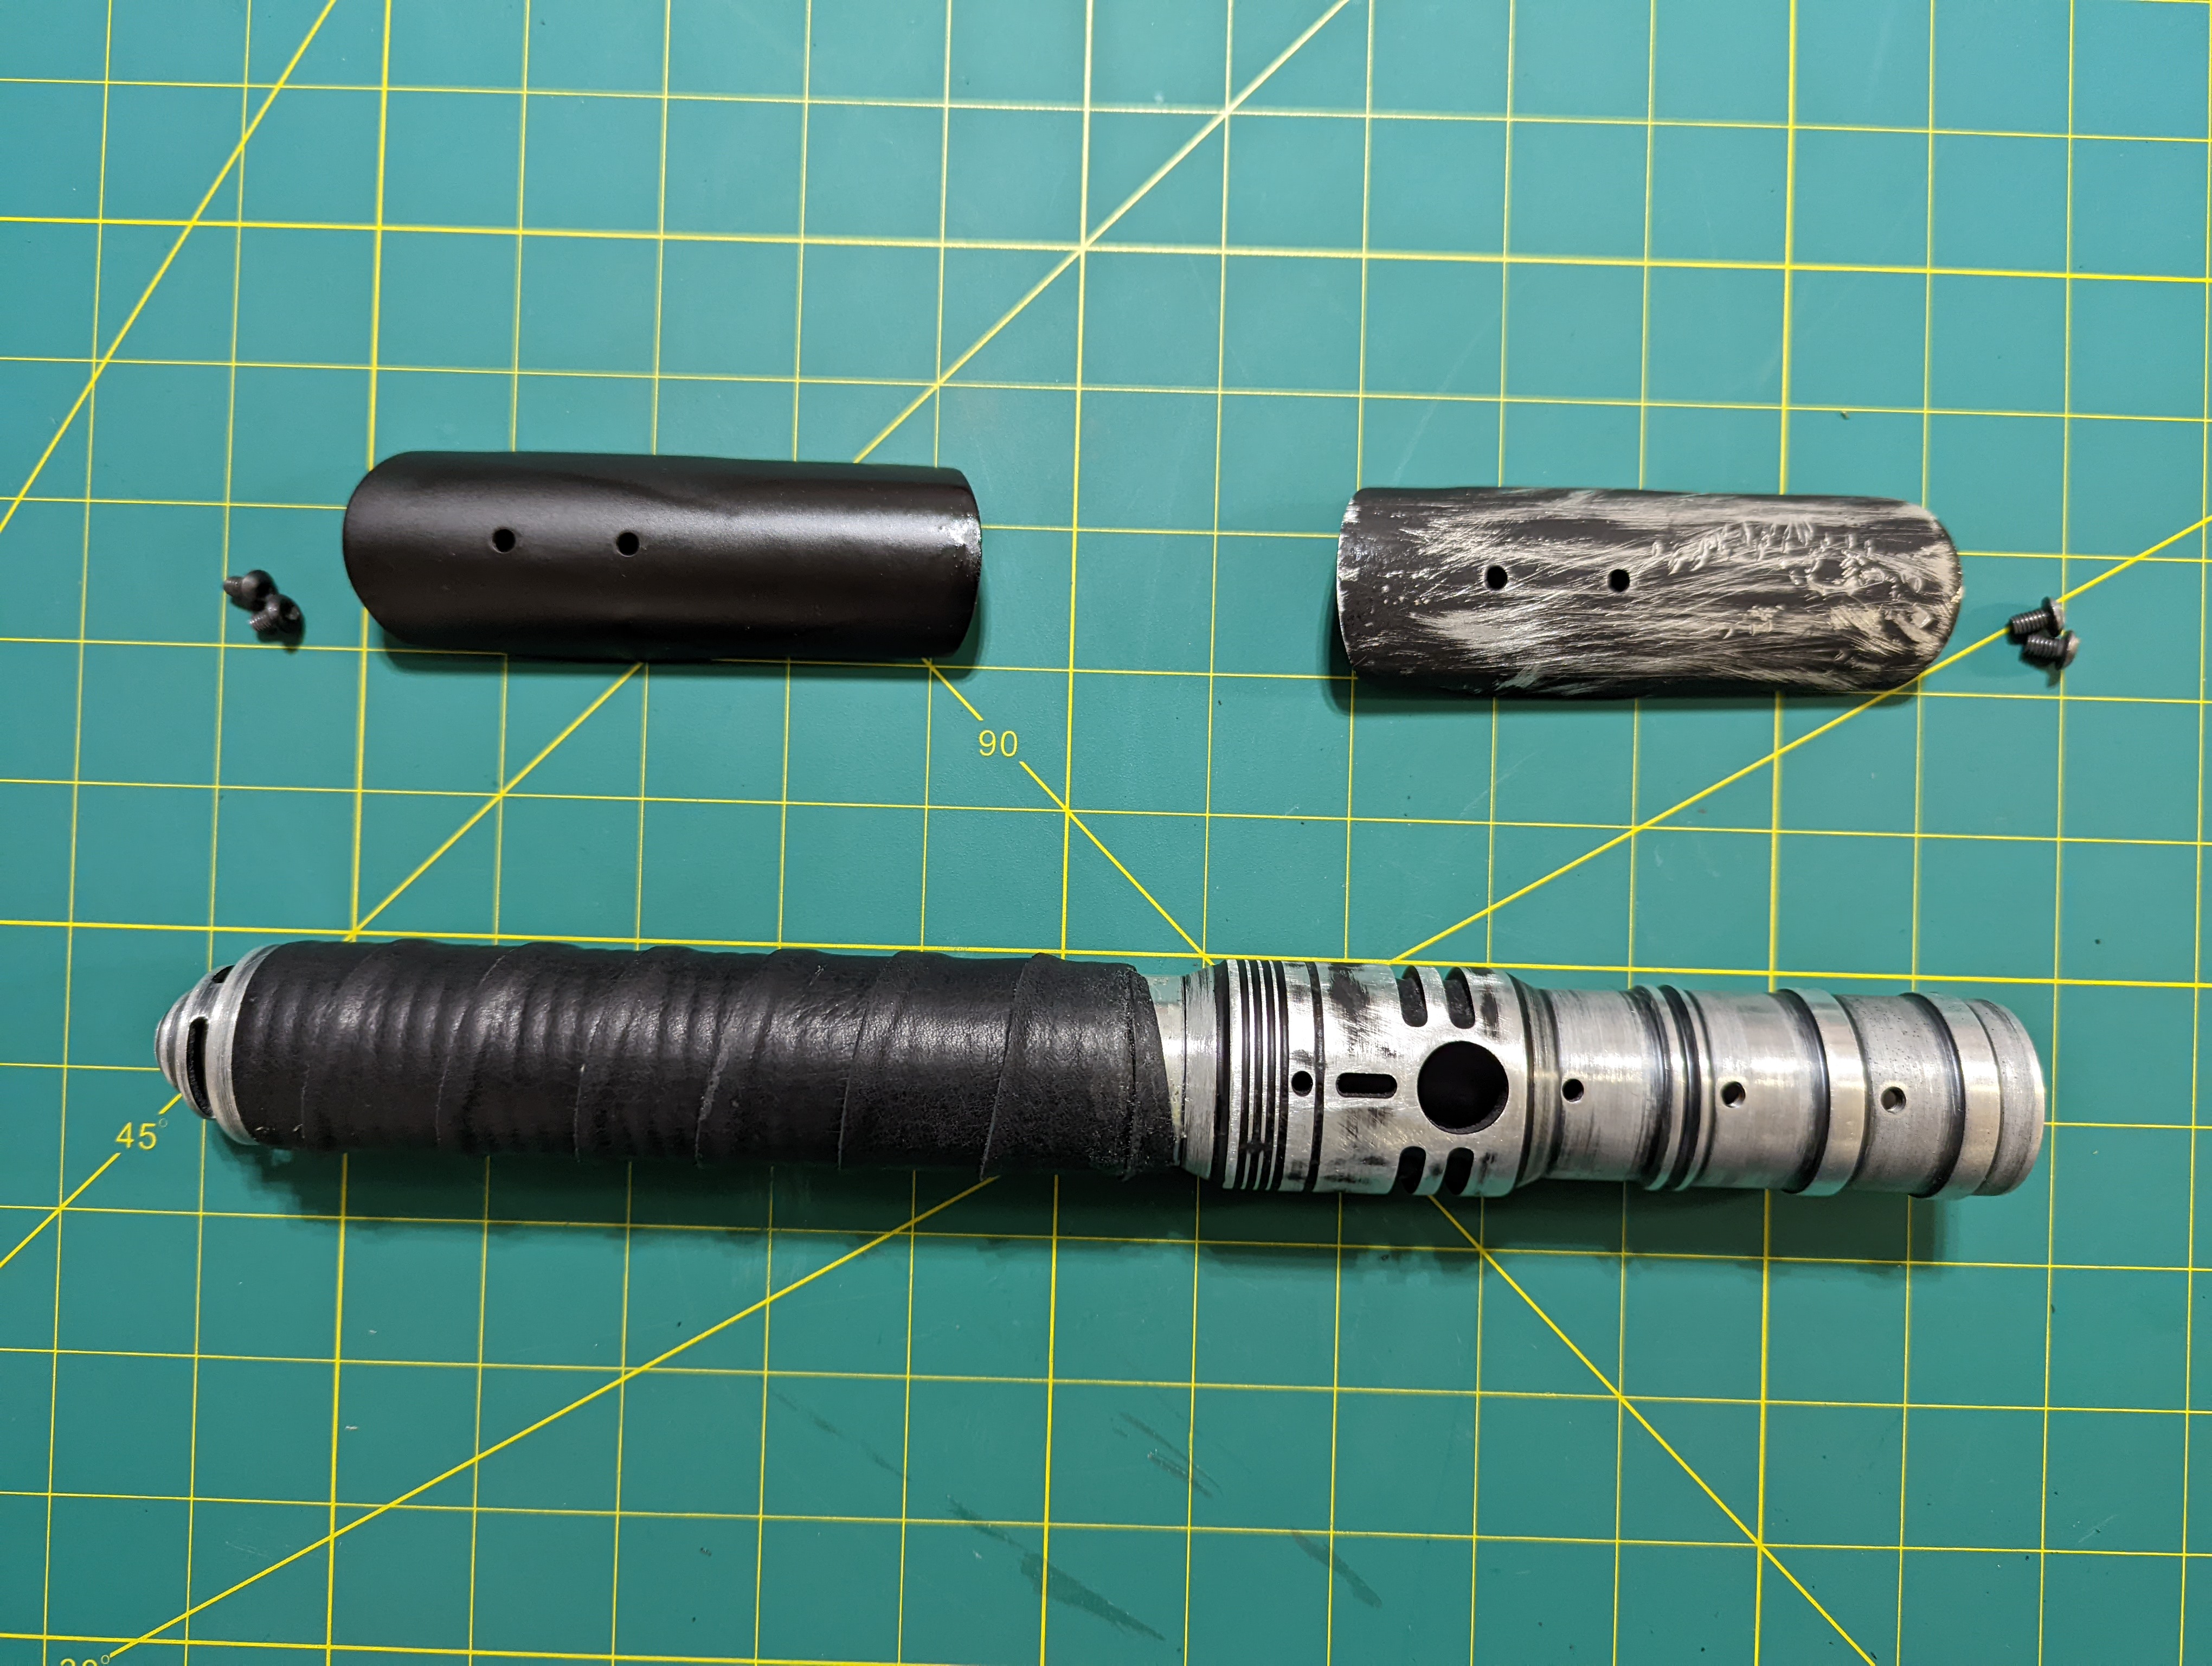
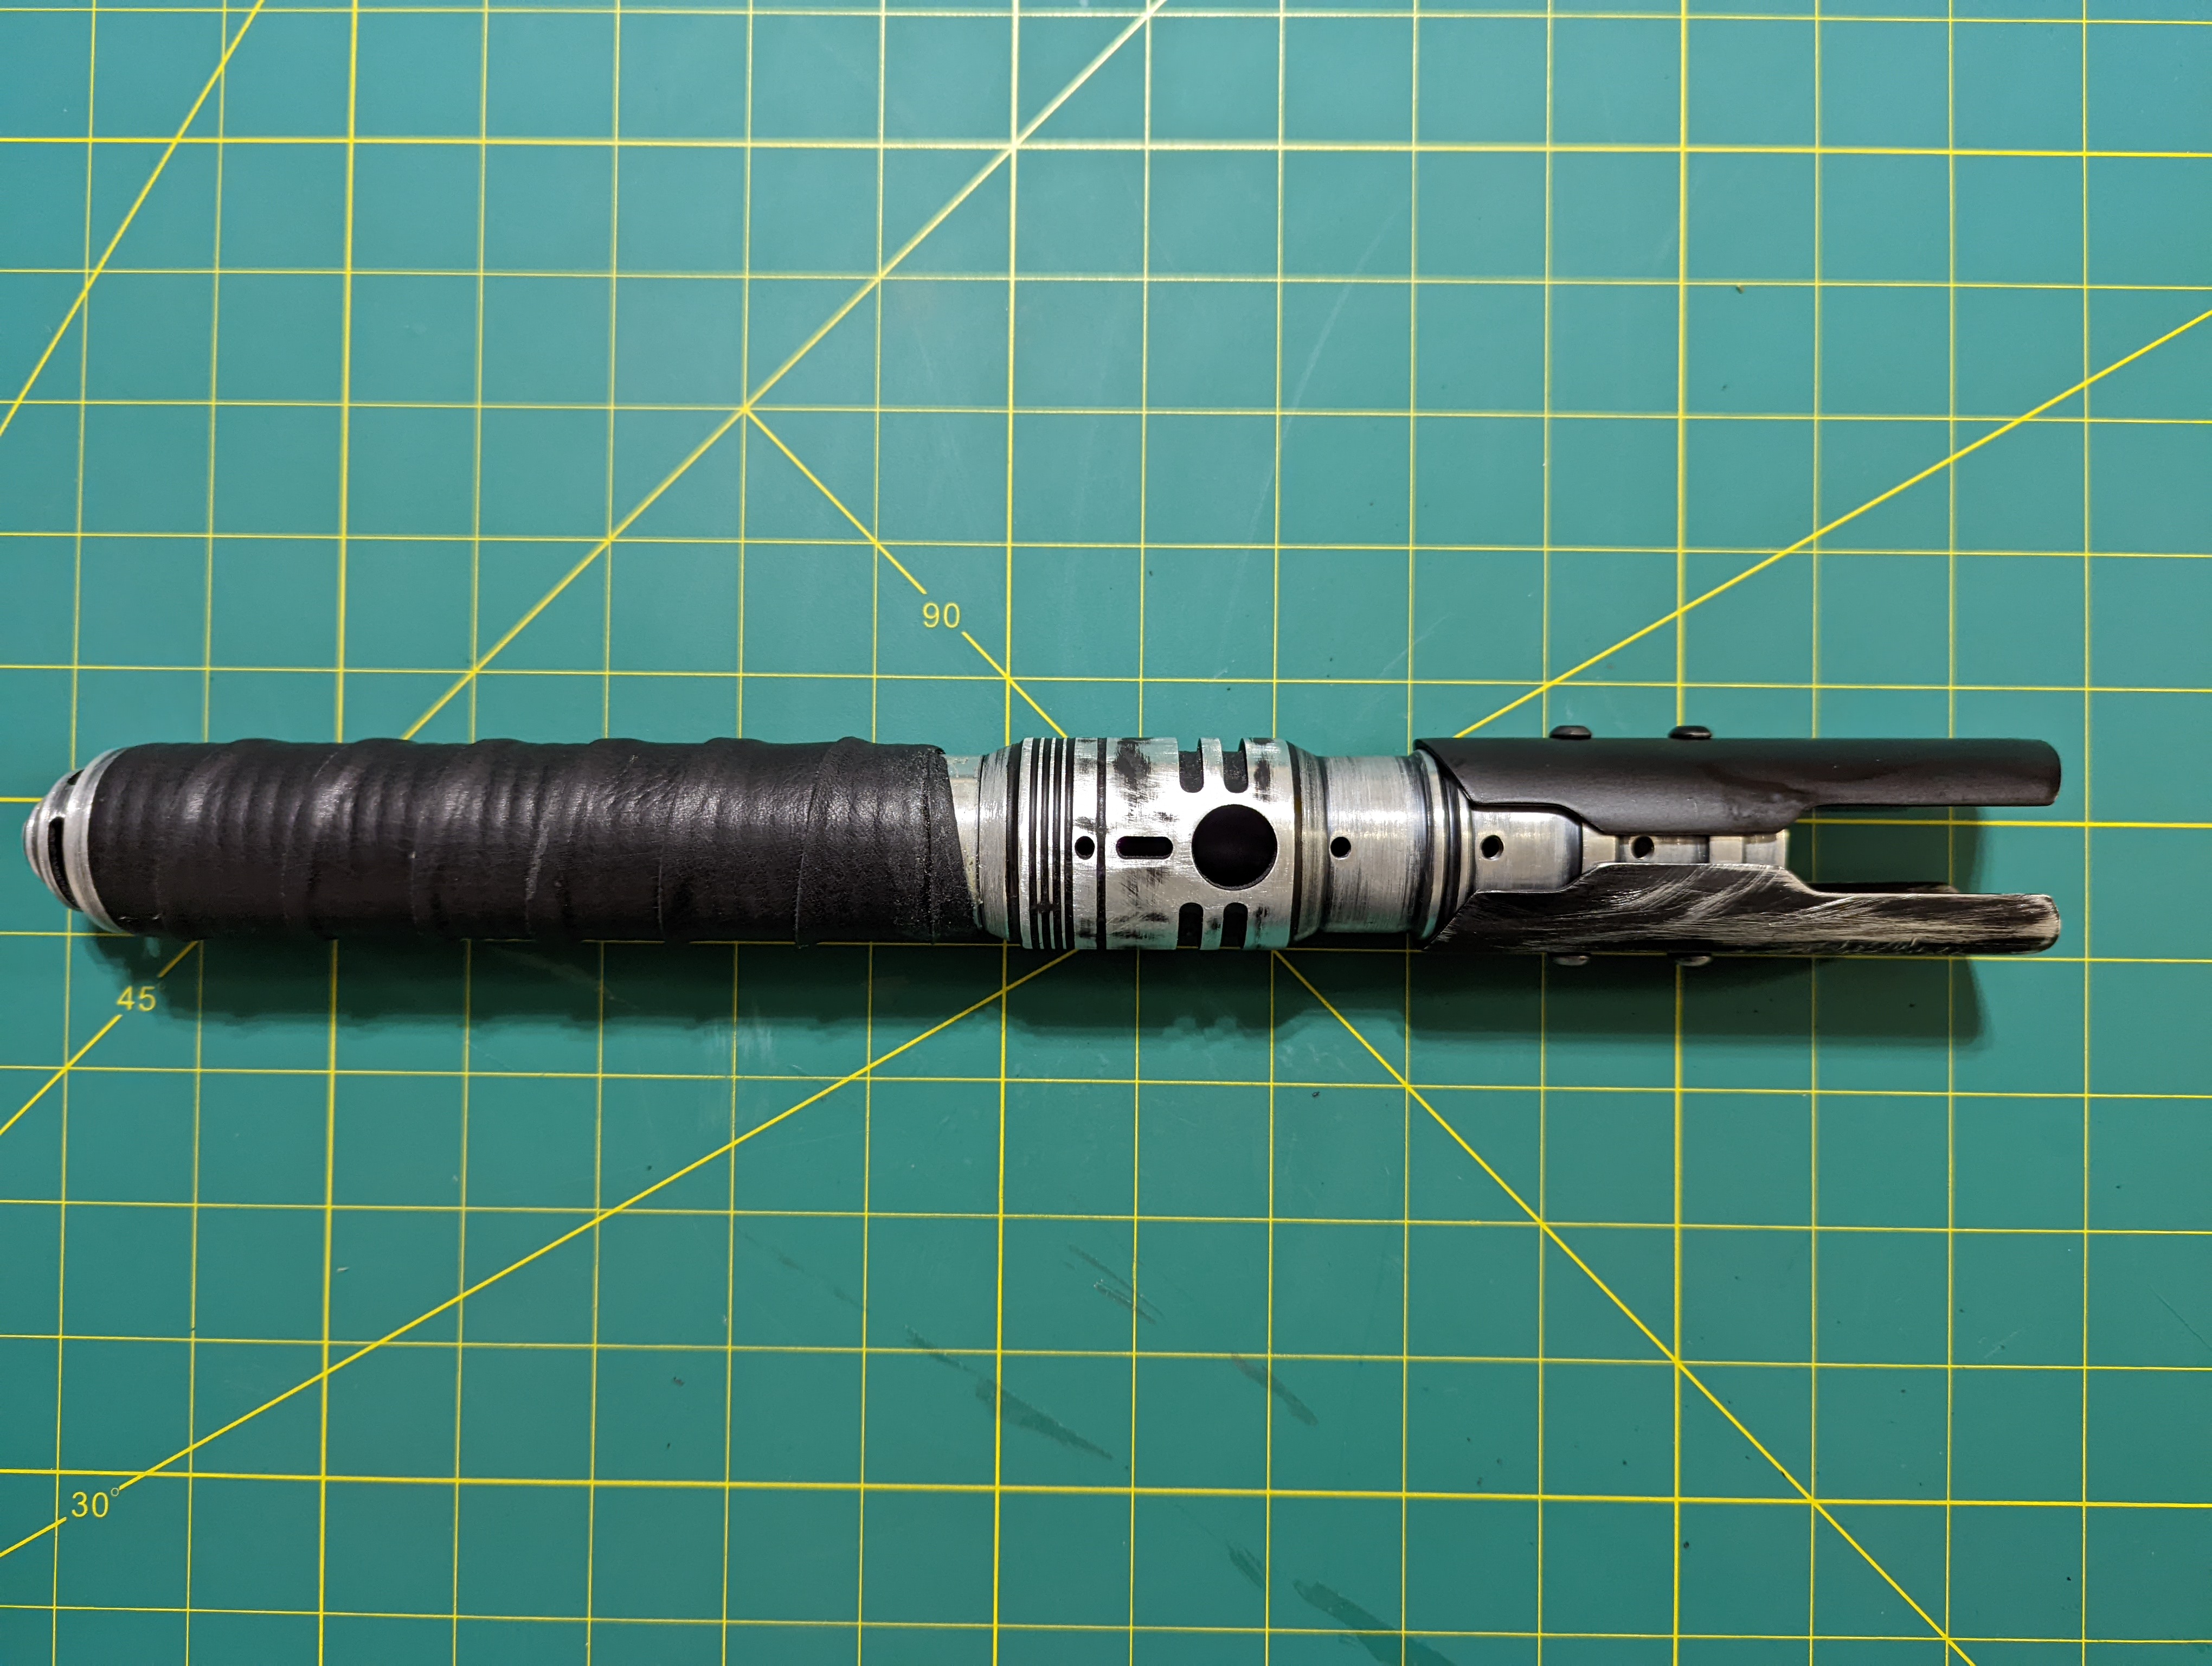
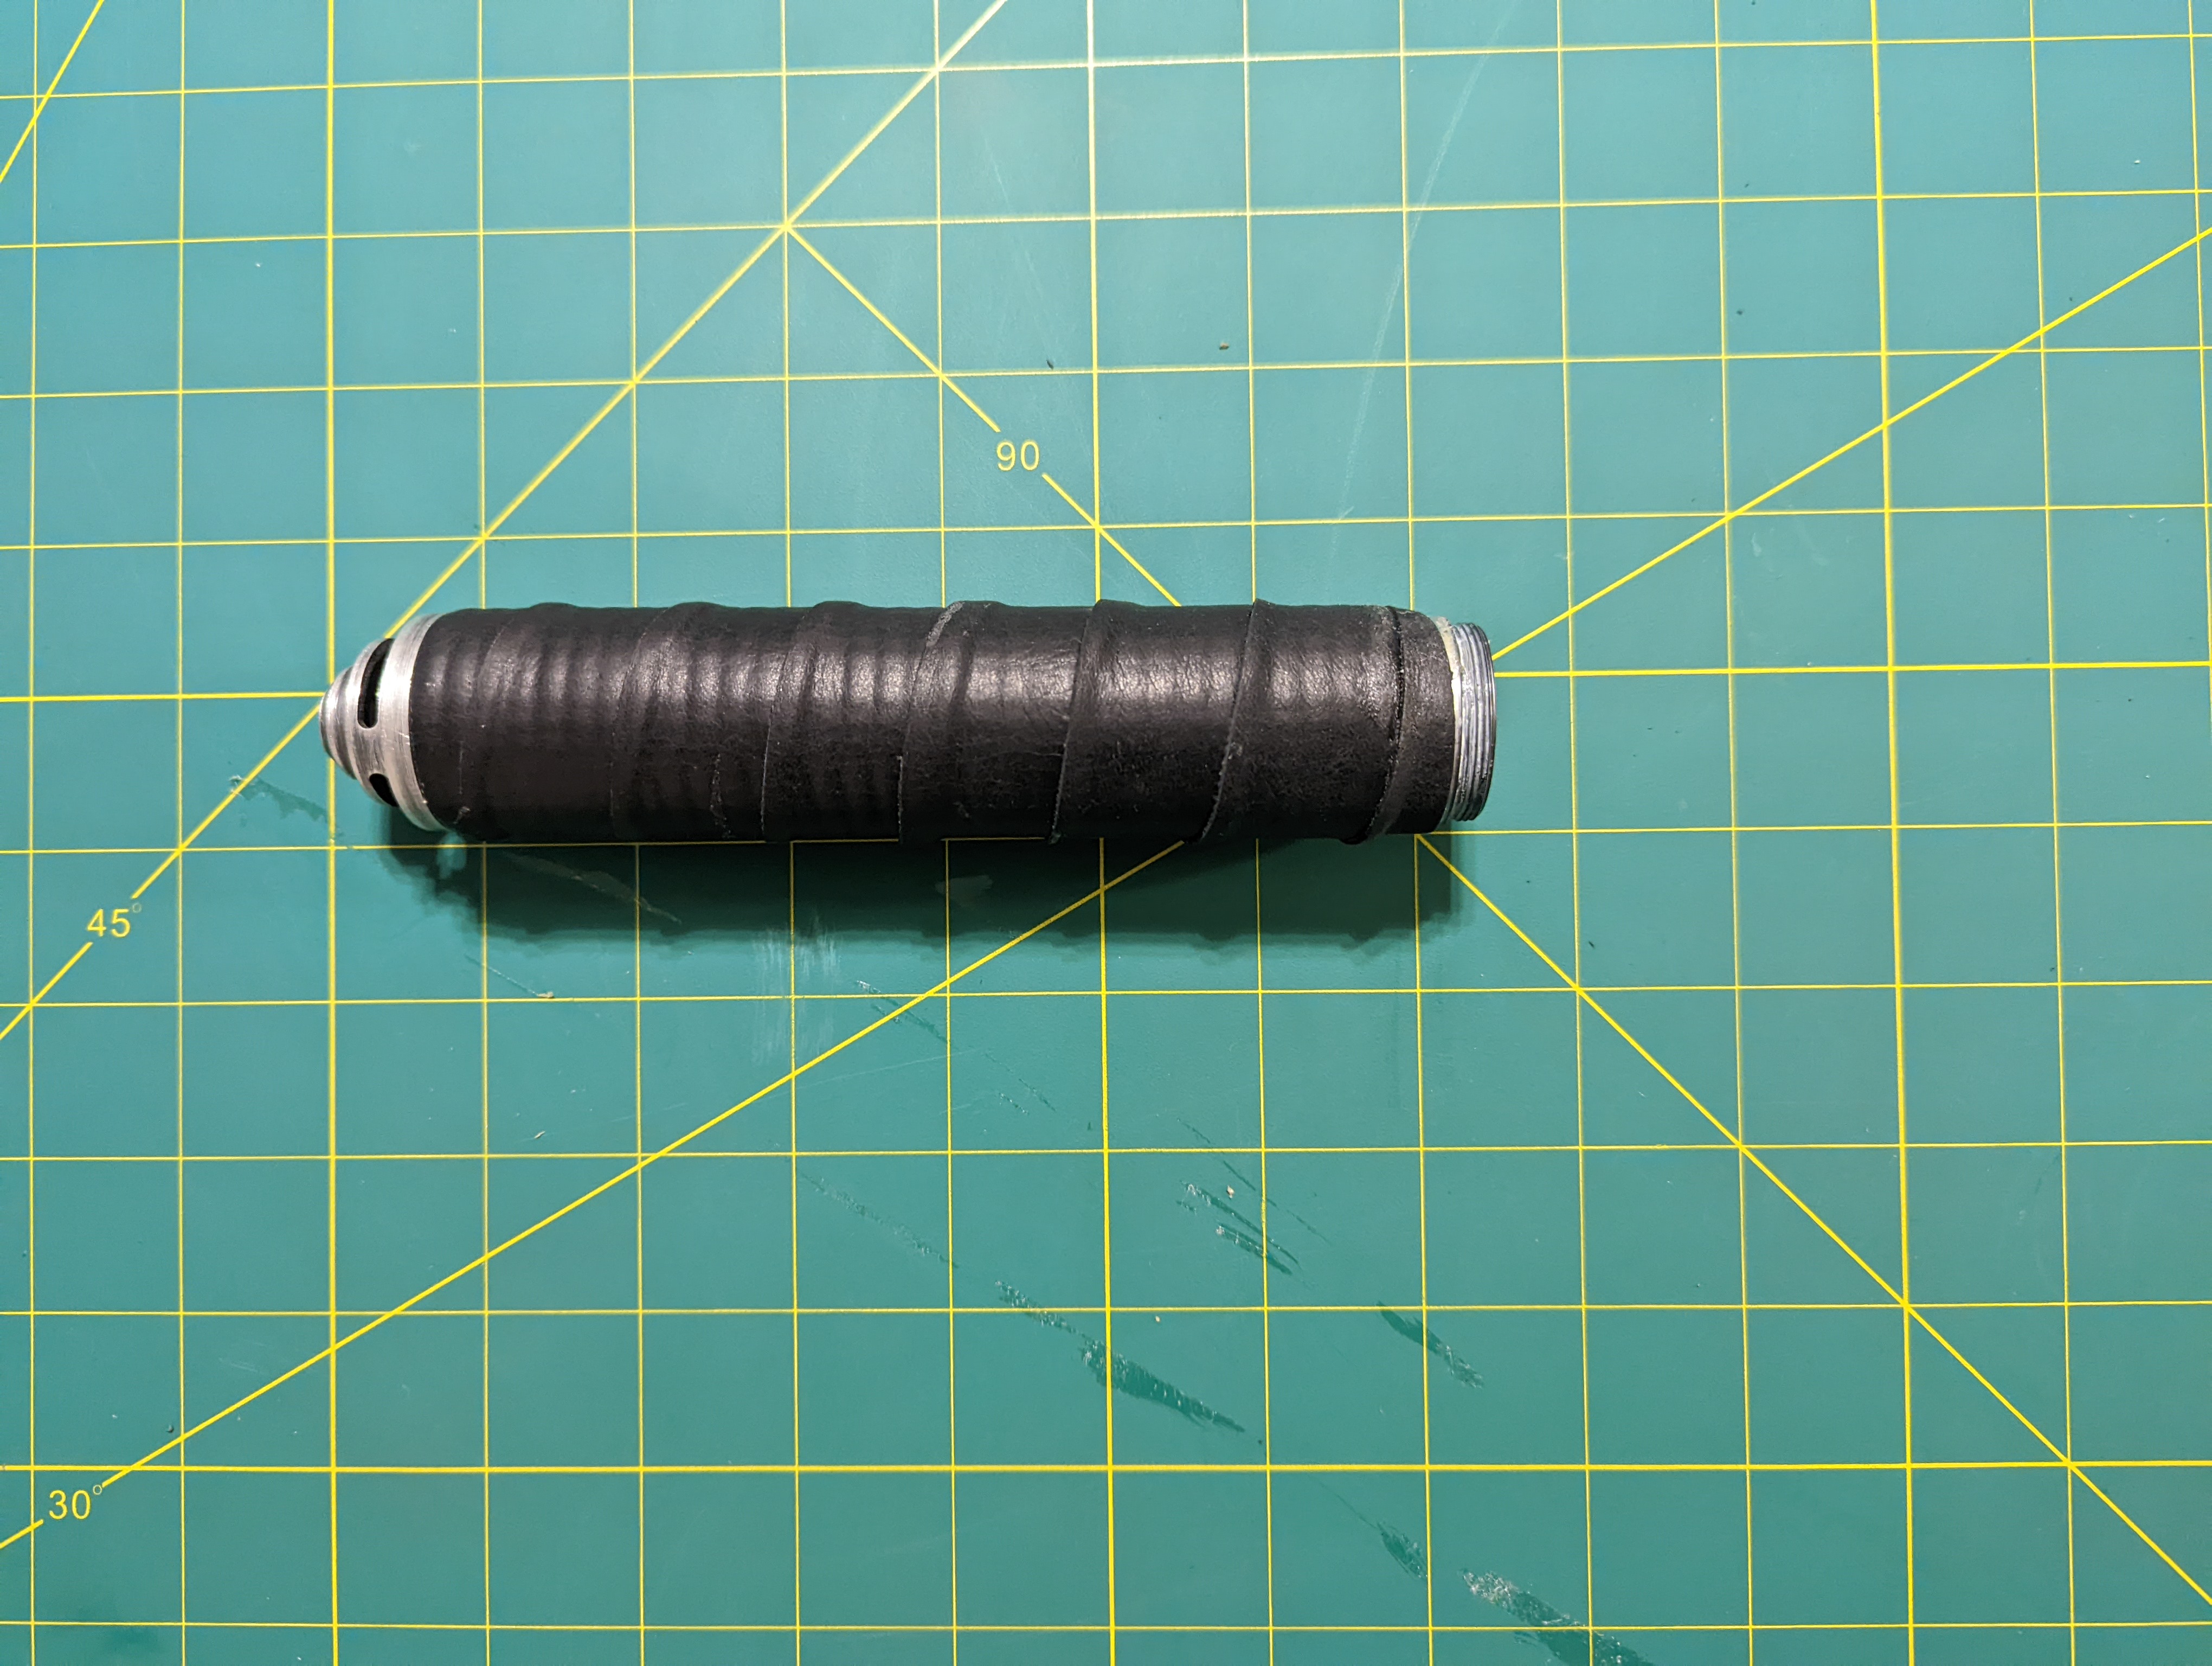
- Much better. Now add a leather wrap for aesthetics and comfort around the grip
- Whoops, in my practice wraps I got the leather to fill out the grip, but when I finally did it with adhesive, I came up short
- Use a small piece of leather to fill in the missing area. Lightly sand parts of the leather to rough it up a little to look more used
- I wanted the switch to be raised above the hilt. To do that I needed a “switch bezel” since the whole was bigger than the switch. I needed to sand down the interior and exterior of a metal switch bezel so I can place a raised switch into the switch hole
- Whoops (sorta), I used a hammer to tap the switch bezel in. I like the damage look it adds, but a softer mallet probably would of been better
- On to the electronics! Test solder the LED module with it’s resistors. Connect it to the battery with electric tape and huzzah! It lights up!
- I did eventually decide to not use the white LED for the blade as it muted the color of the two blue LEDs I have. I can use the white LED for “flash on clash” in the future
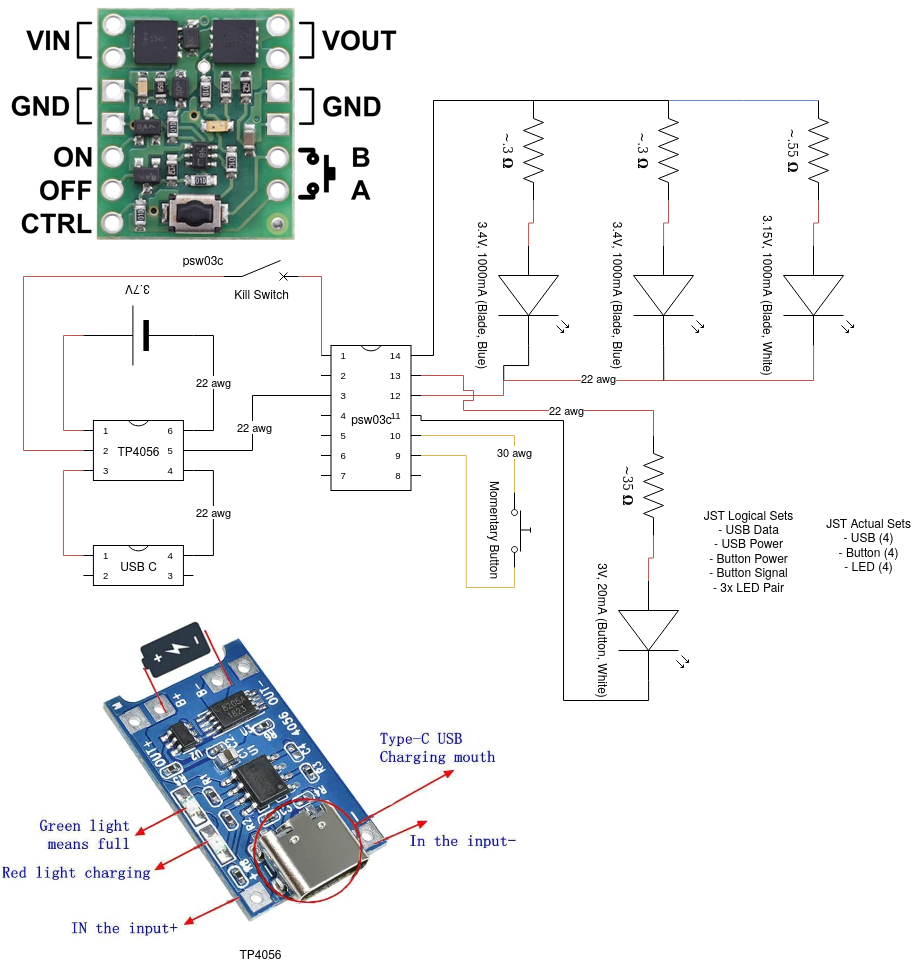
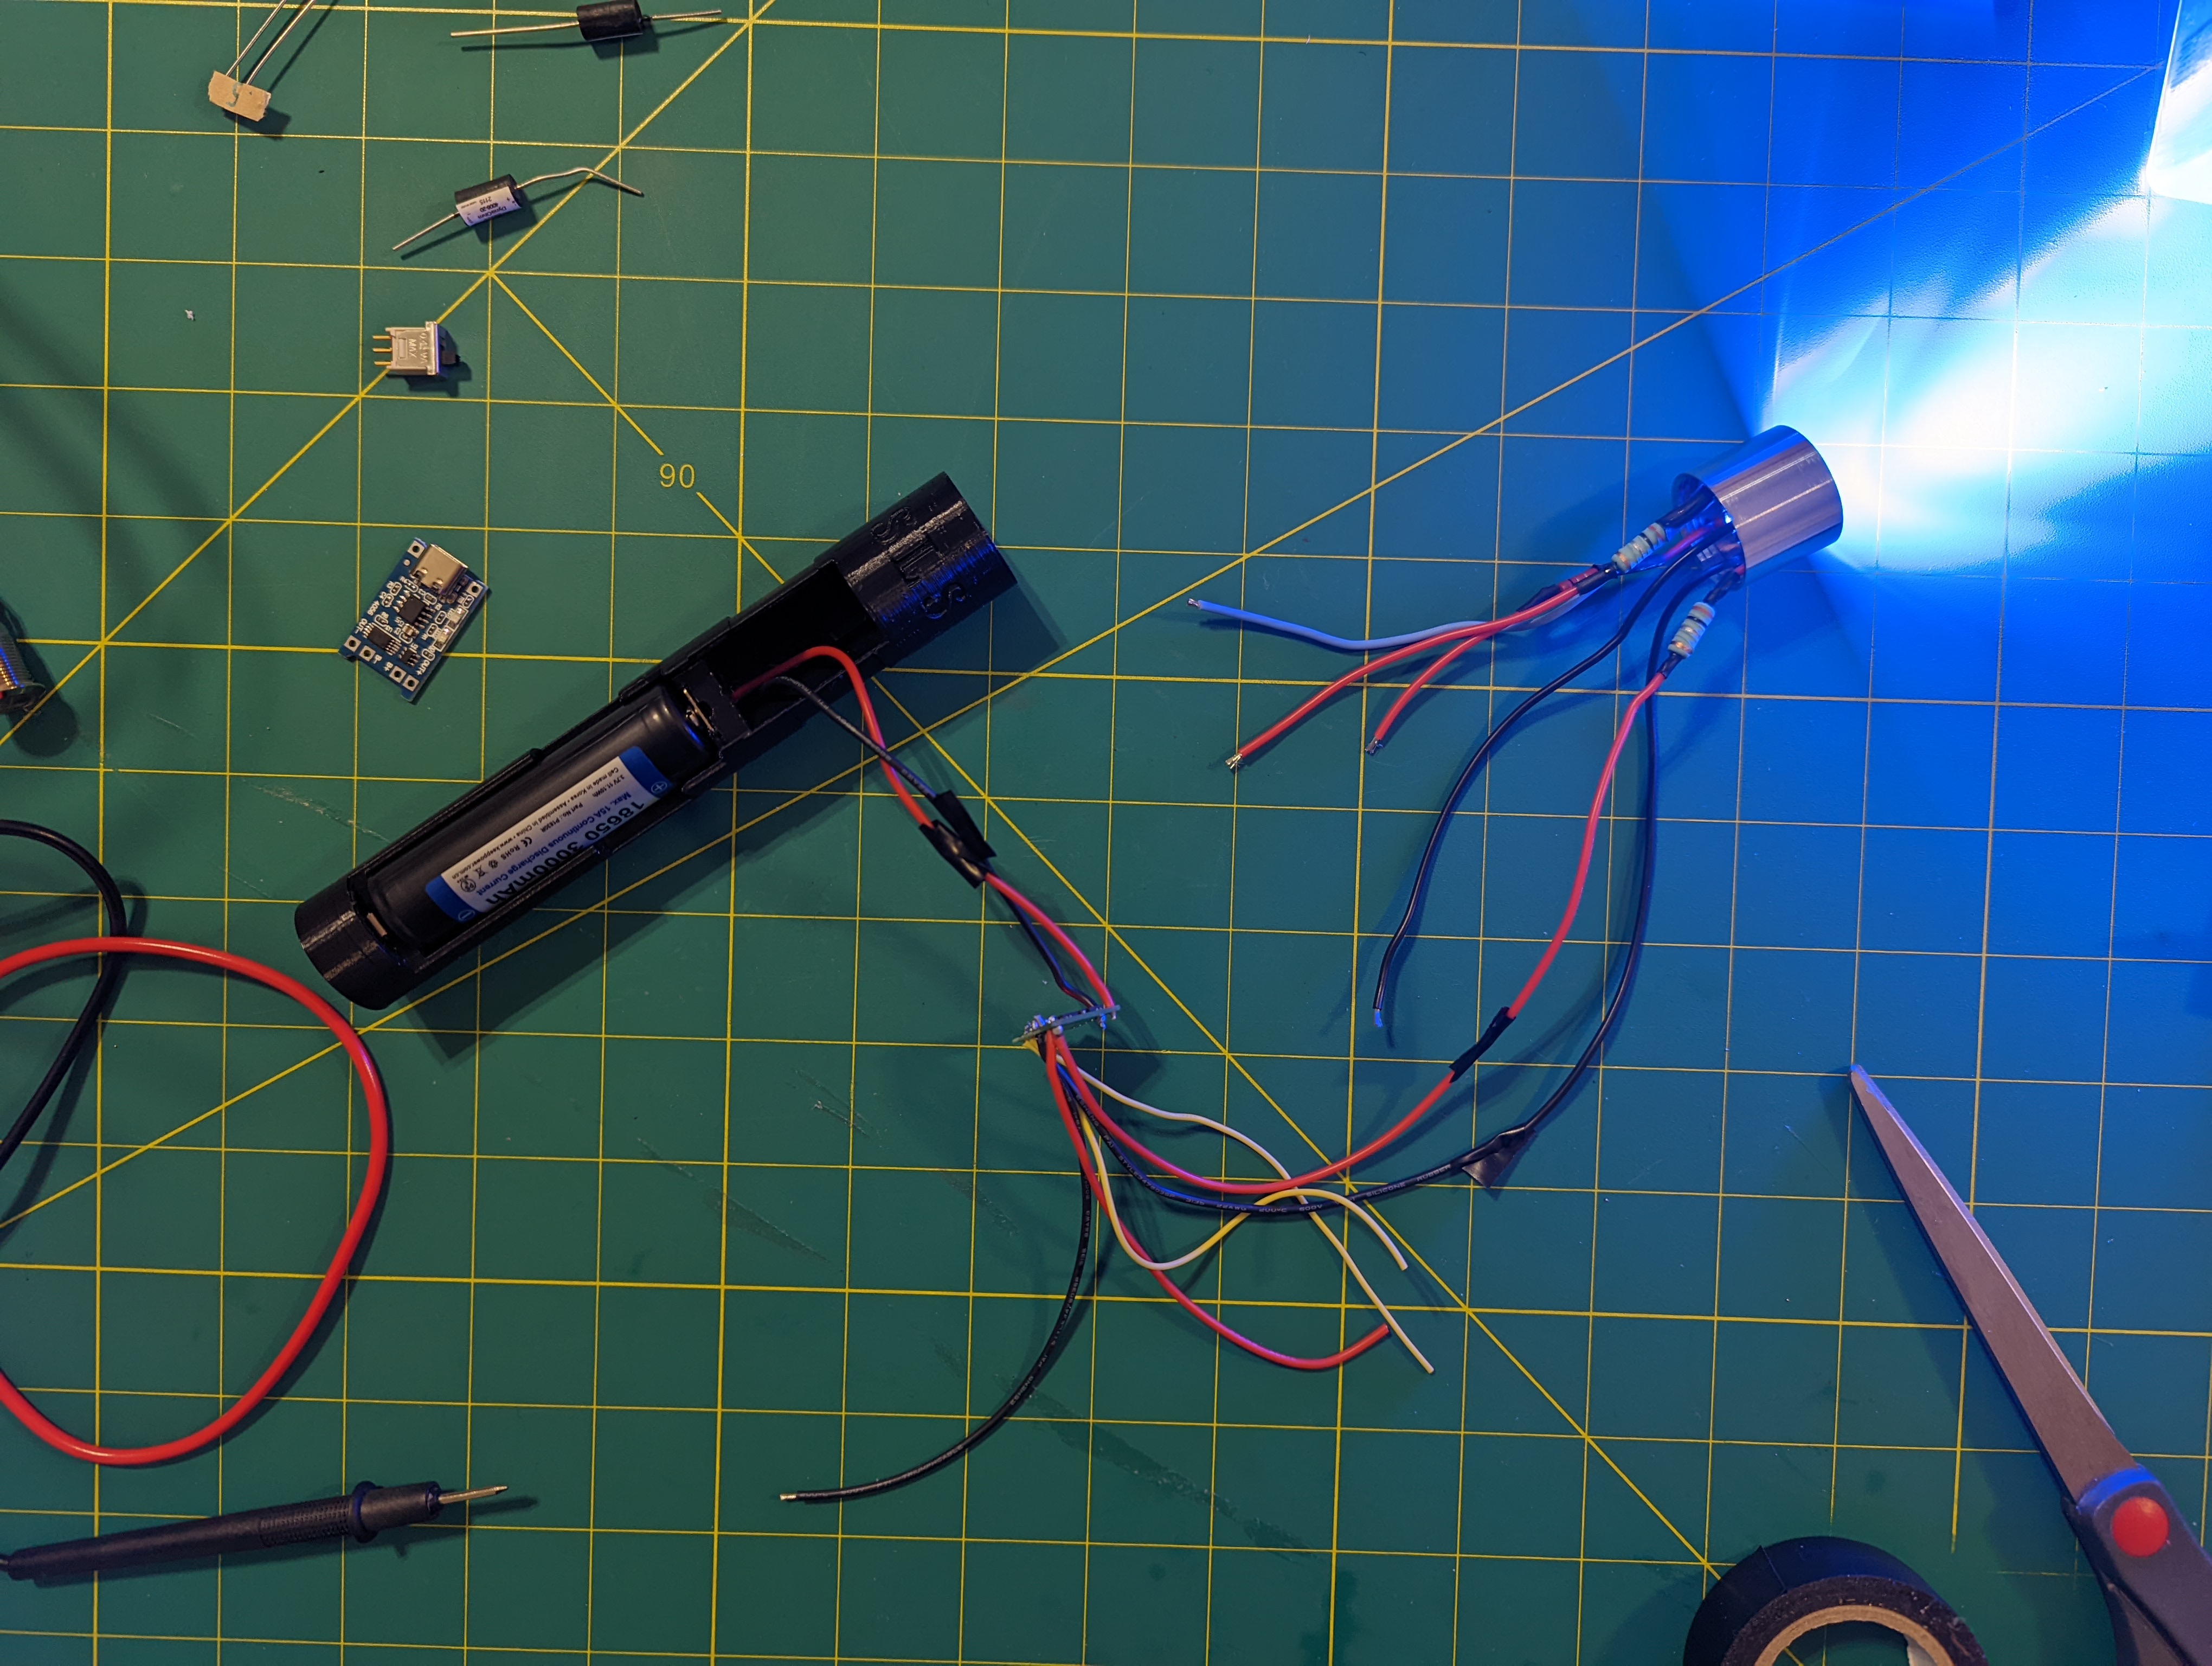
- Whoops, one of the resistors wasn’t soldered on well and it’s connection was so poor it melted the solder. Resolder and check all the other points
- Solder the switch and the momentary to latching converter board (so our momentary switch can complete or break the circuit at any point) separately. Test them with the battery and electric tape
- Solder up the USB-C port and the TP4056 charging board separately. Test the with the battery.
- Found out the first TP4056 board I had passed through the power, but didn’t actually charge the battery. I bought a pack of 5, so was able to swap it out. This is why you test things!
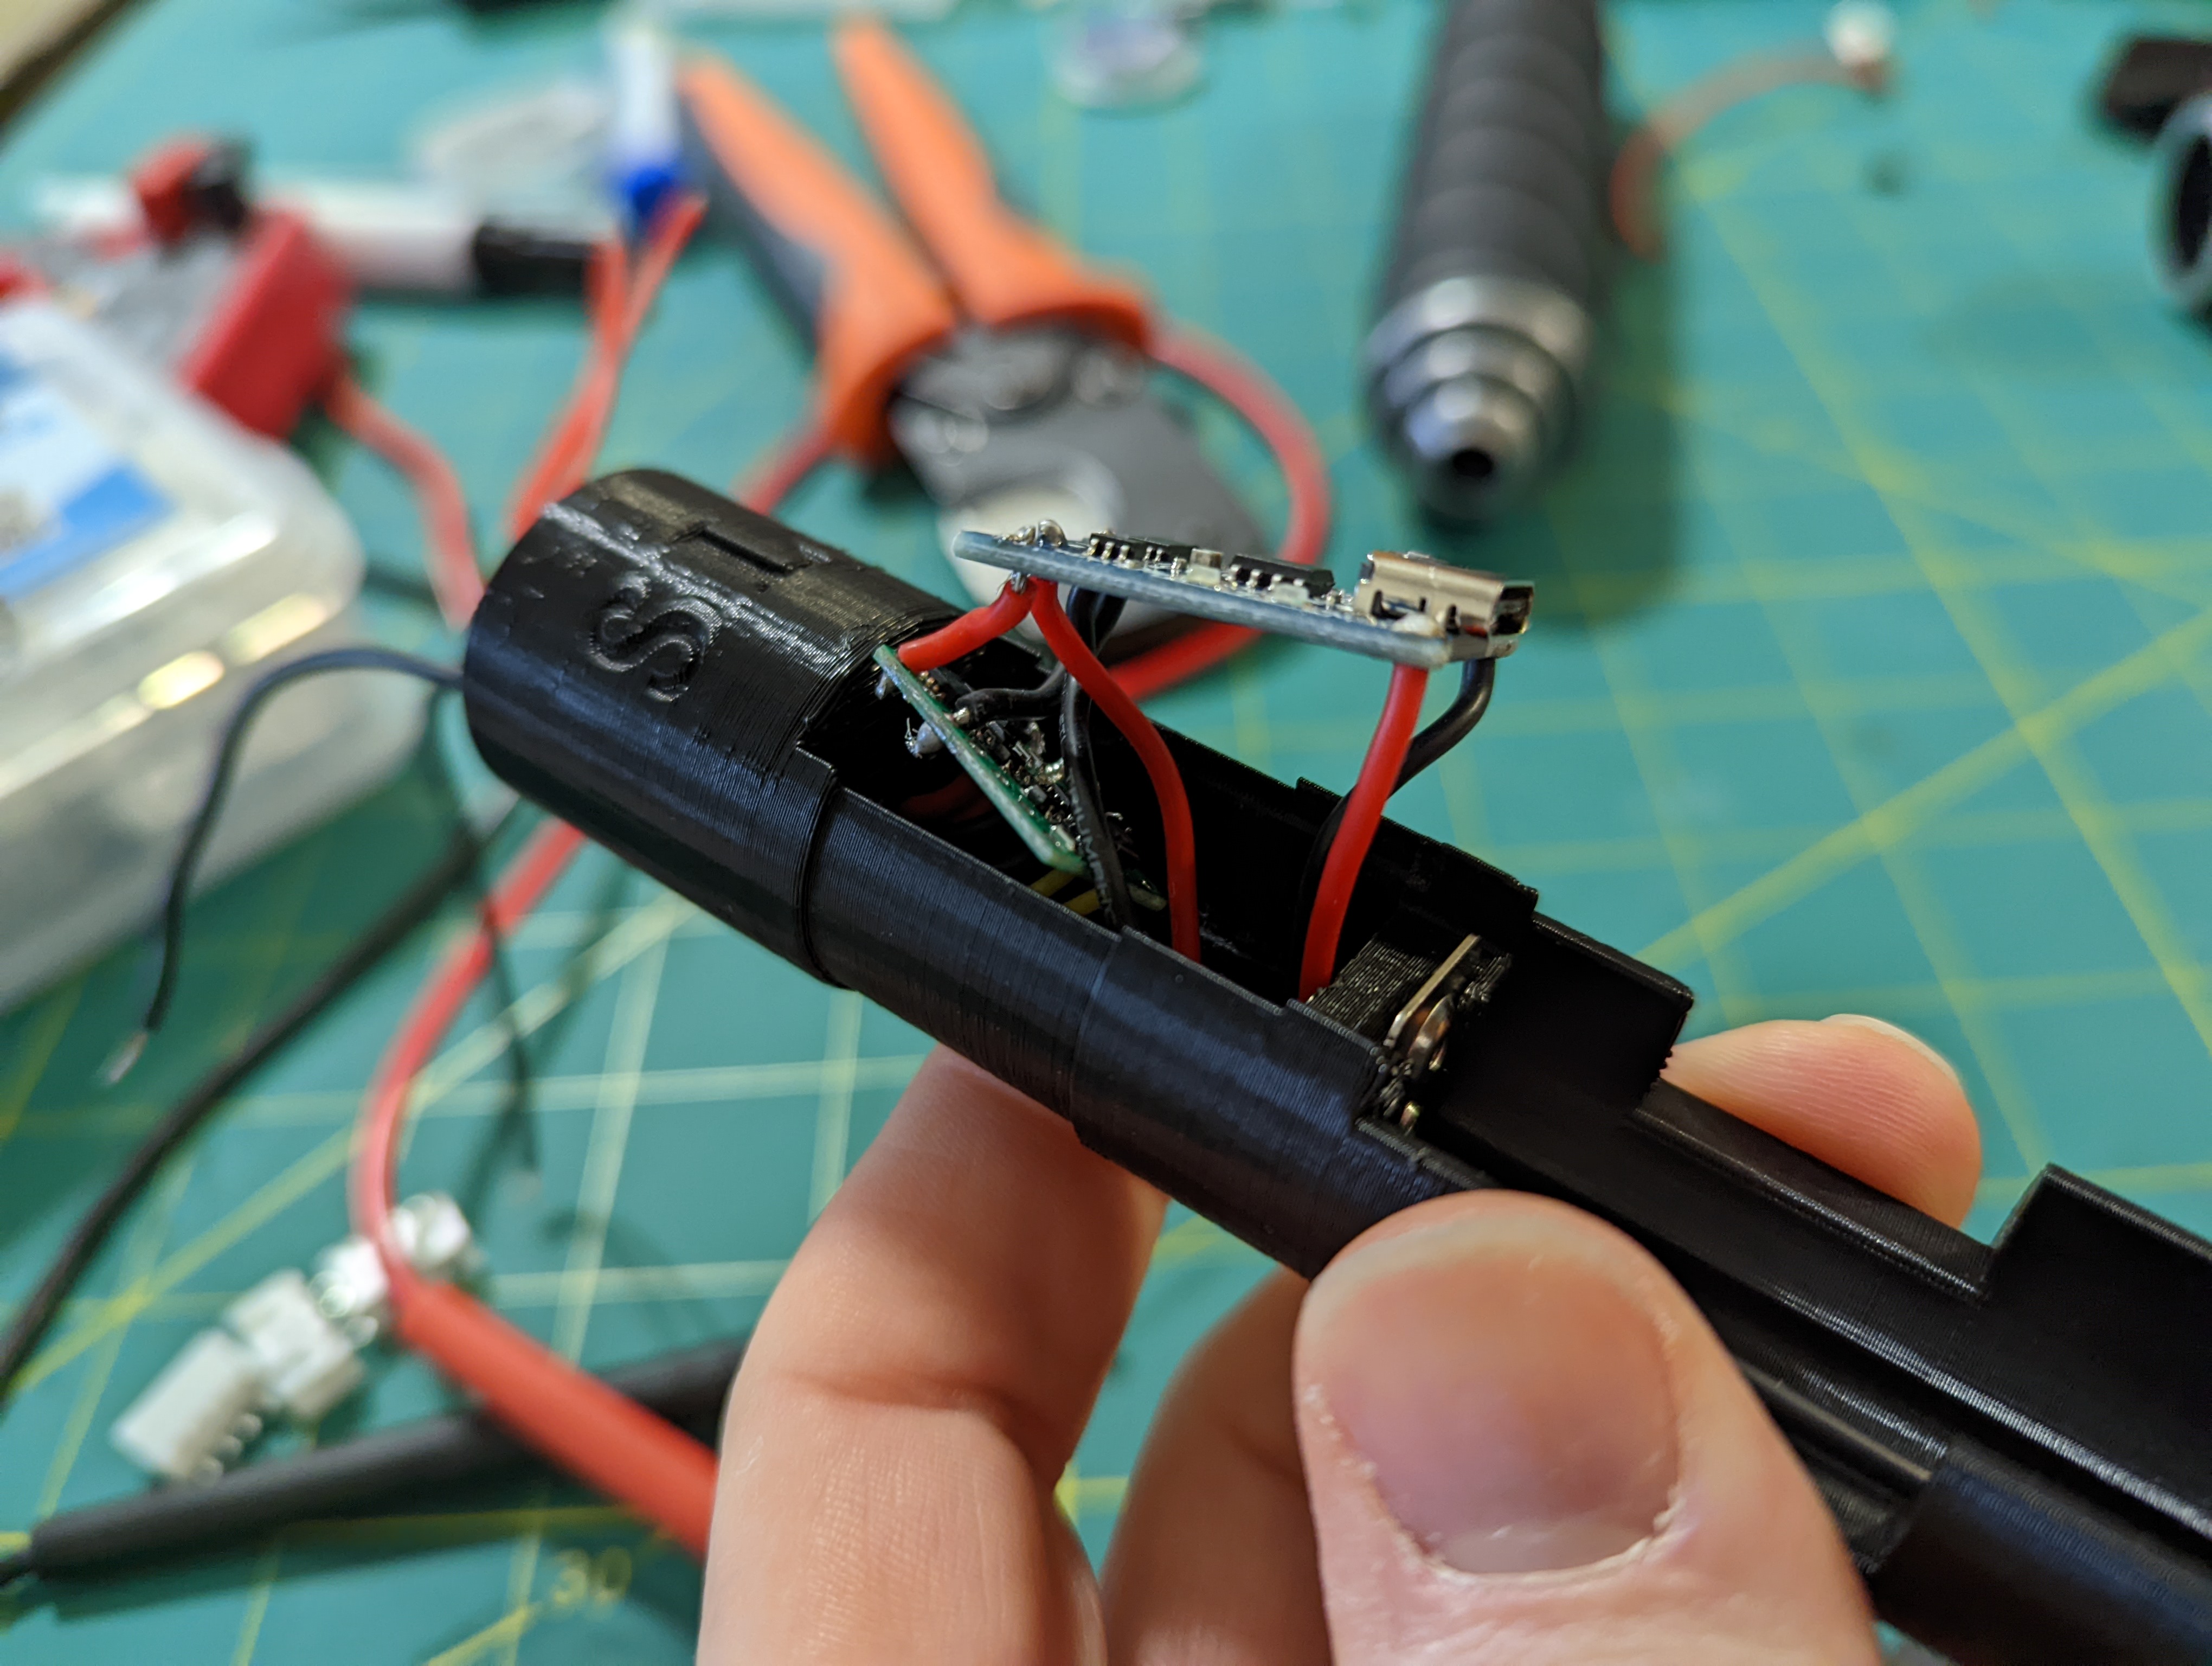
- Now to put everything in the chassis and very very carefully solder them. Tape the boards in for good measure
- Test fit all the components in the saber. Seem to all fit. Crazy glue the USB-C port in and cut all the wires so they are long enough to connect to each other, but don’t take up extra space
- For easily swapping and disconnecting components, I used JST-XH connectors for all the “separable parts”, the LED module, switch, USB-C port, and the chassis
- Not going to lie, figuring out how to crimp the JST-XH pieces on wires took me a bit. Be prepared to practice on “junk” pieces before having to trim and redo it on important wires
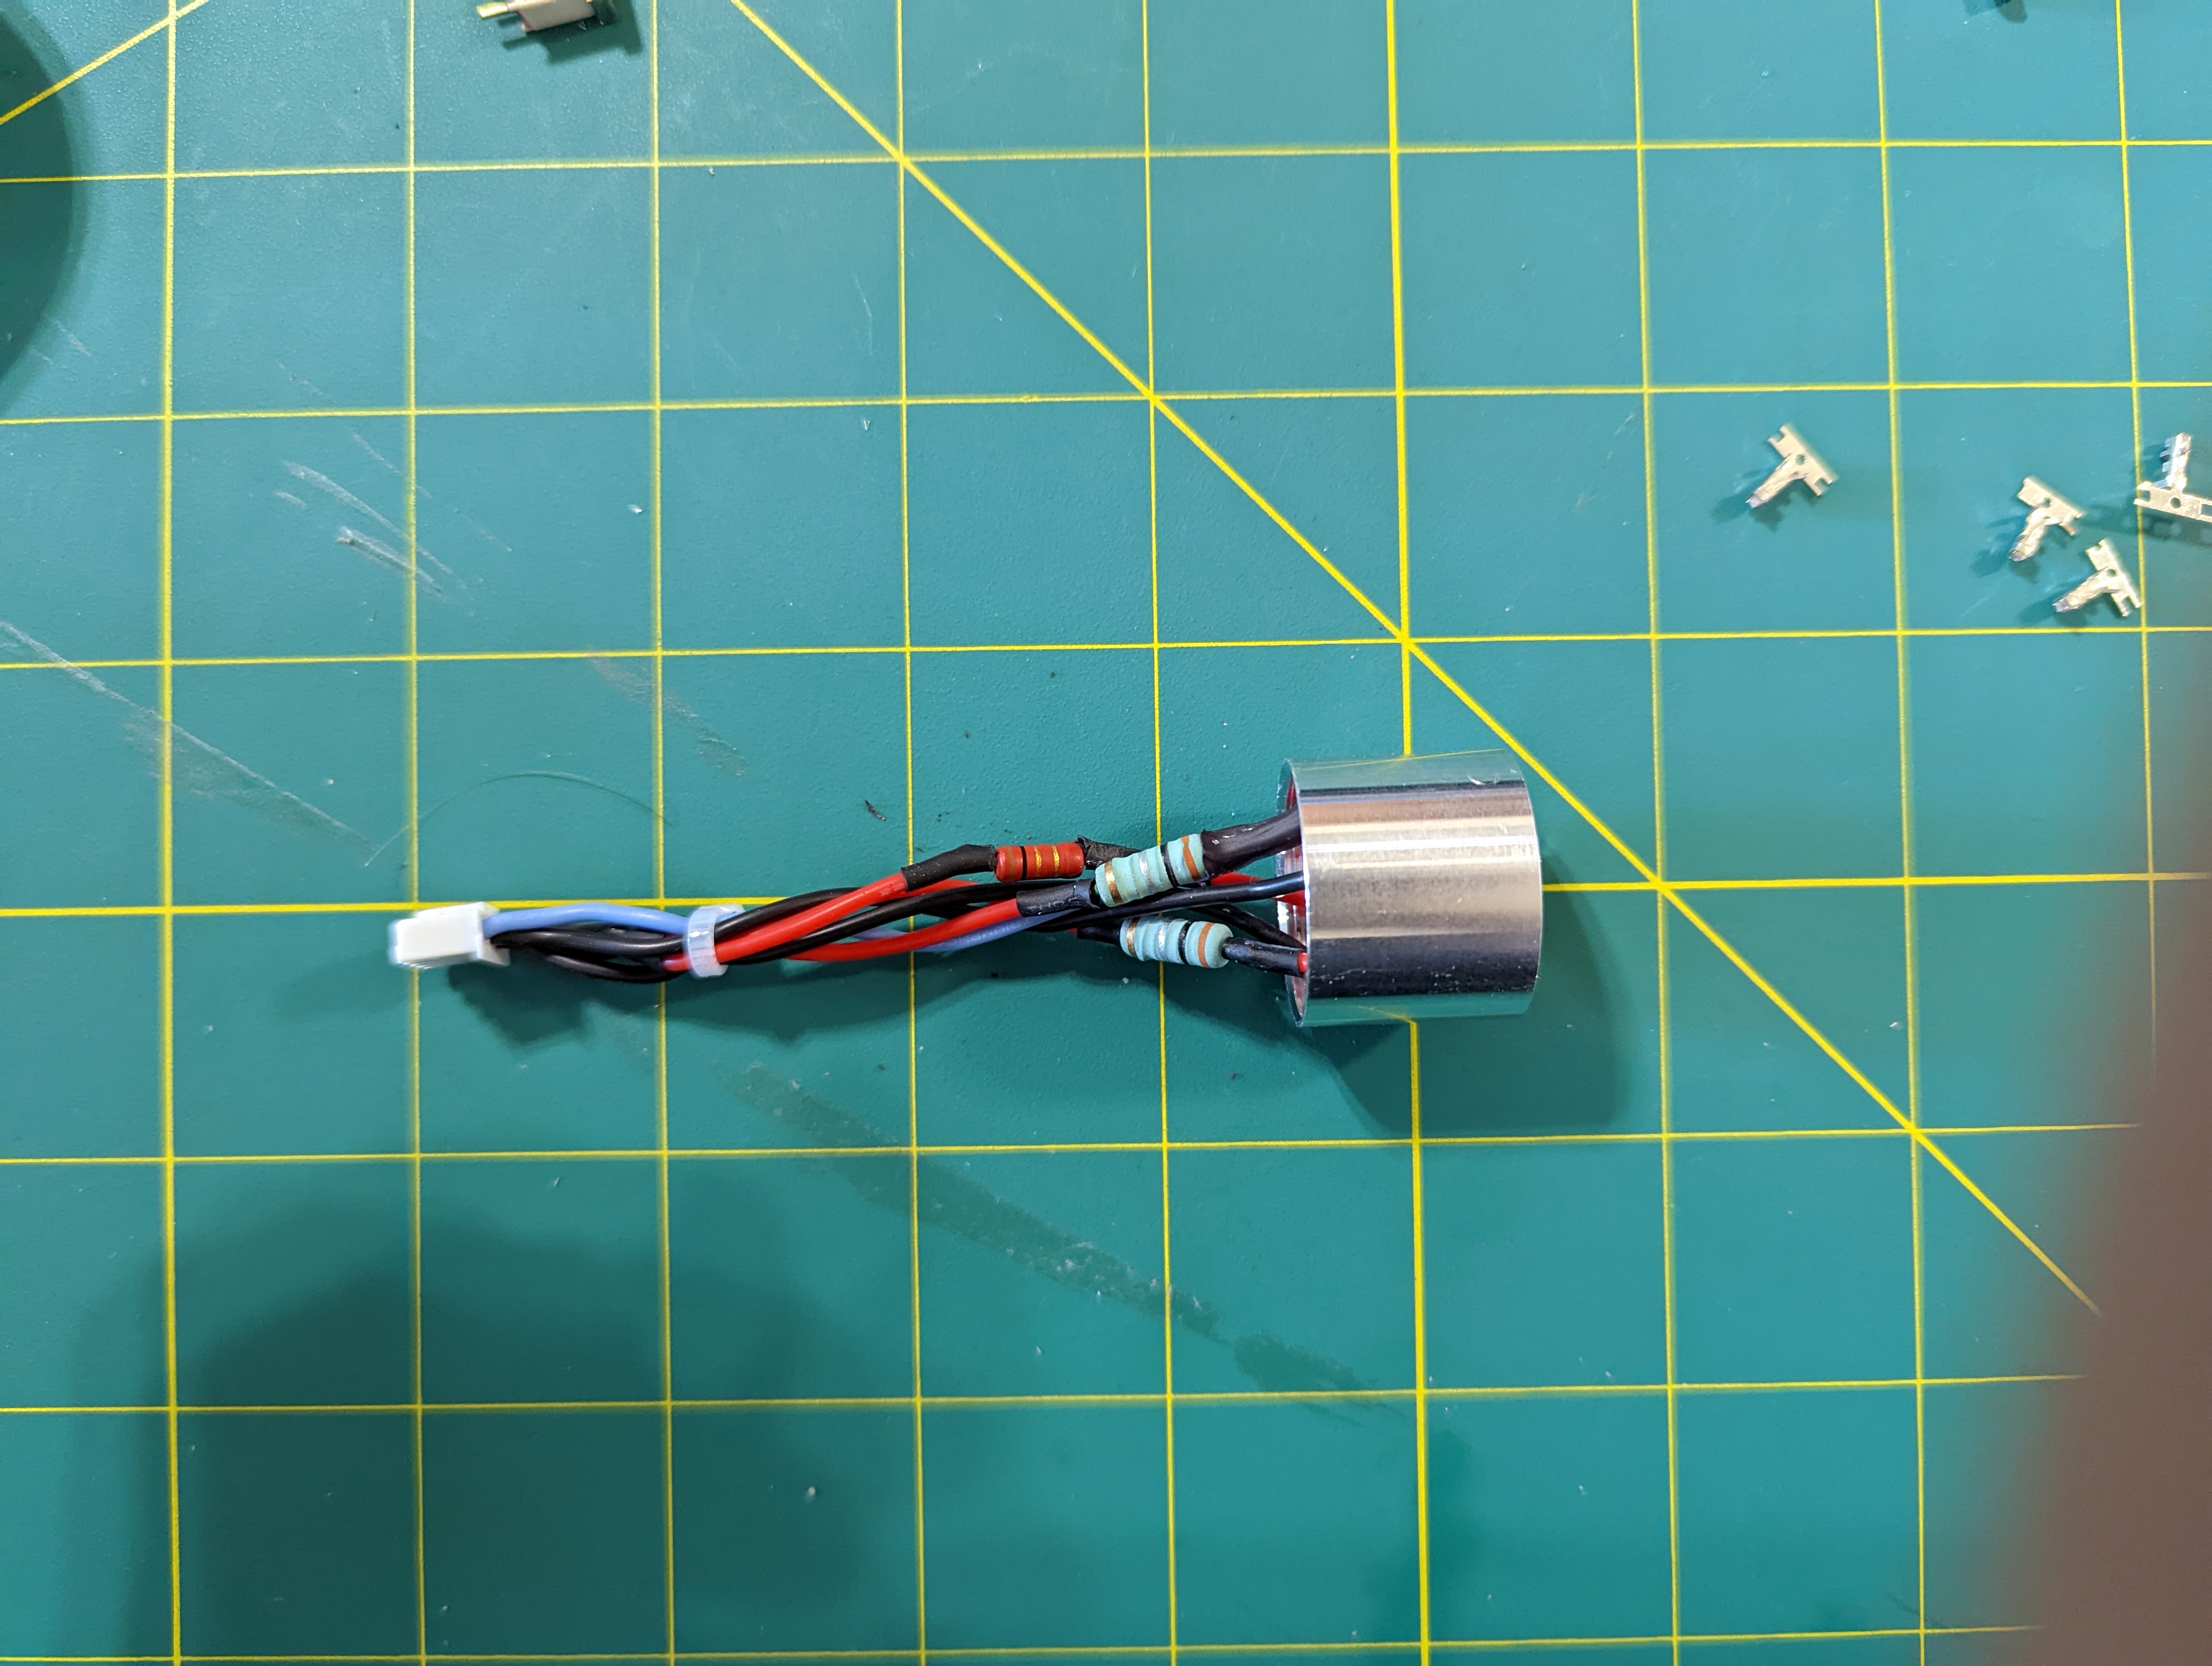
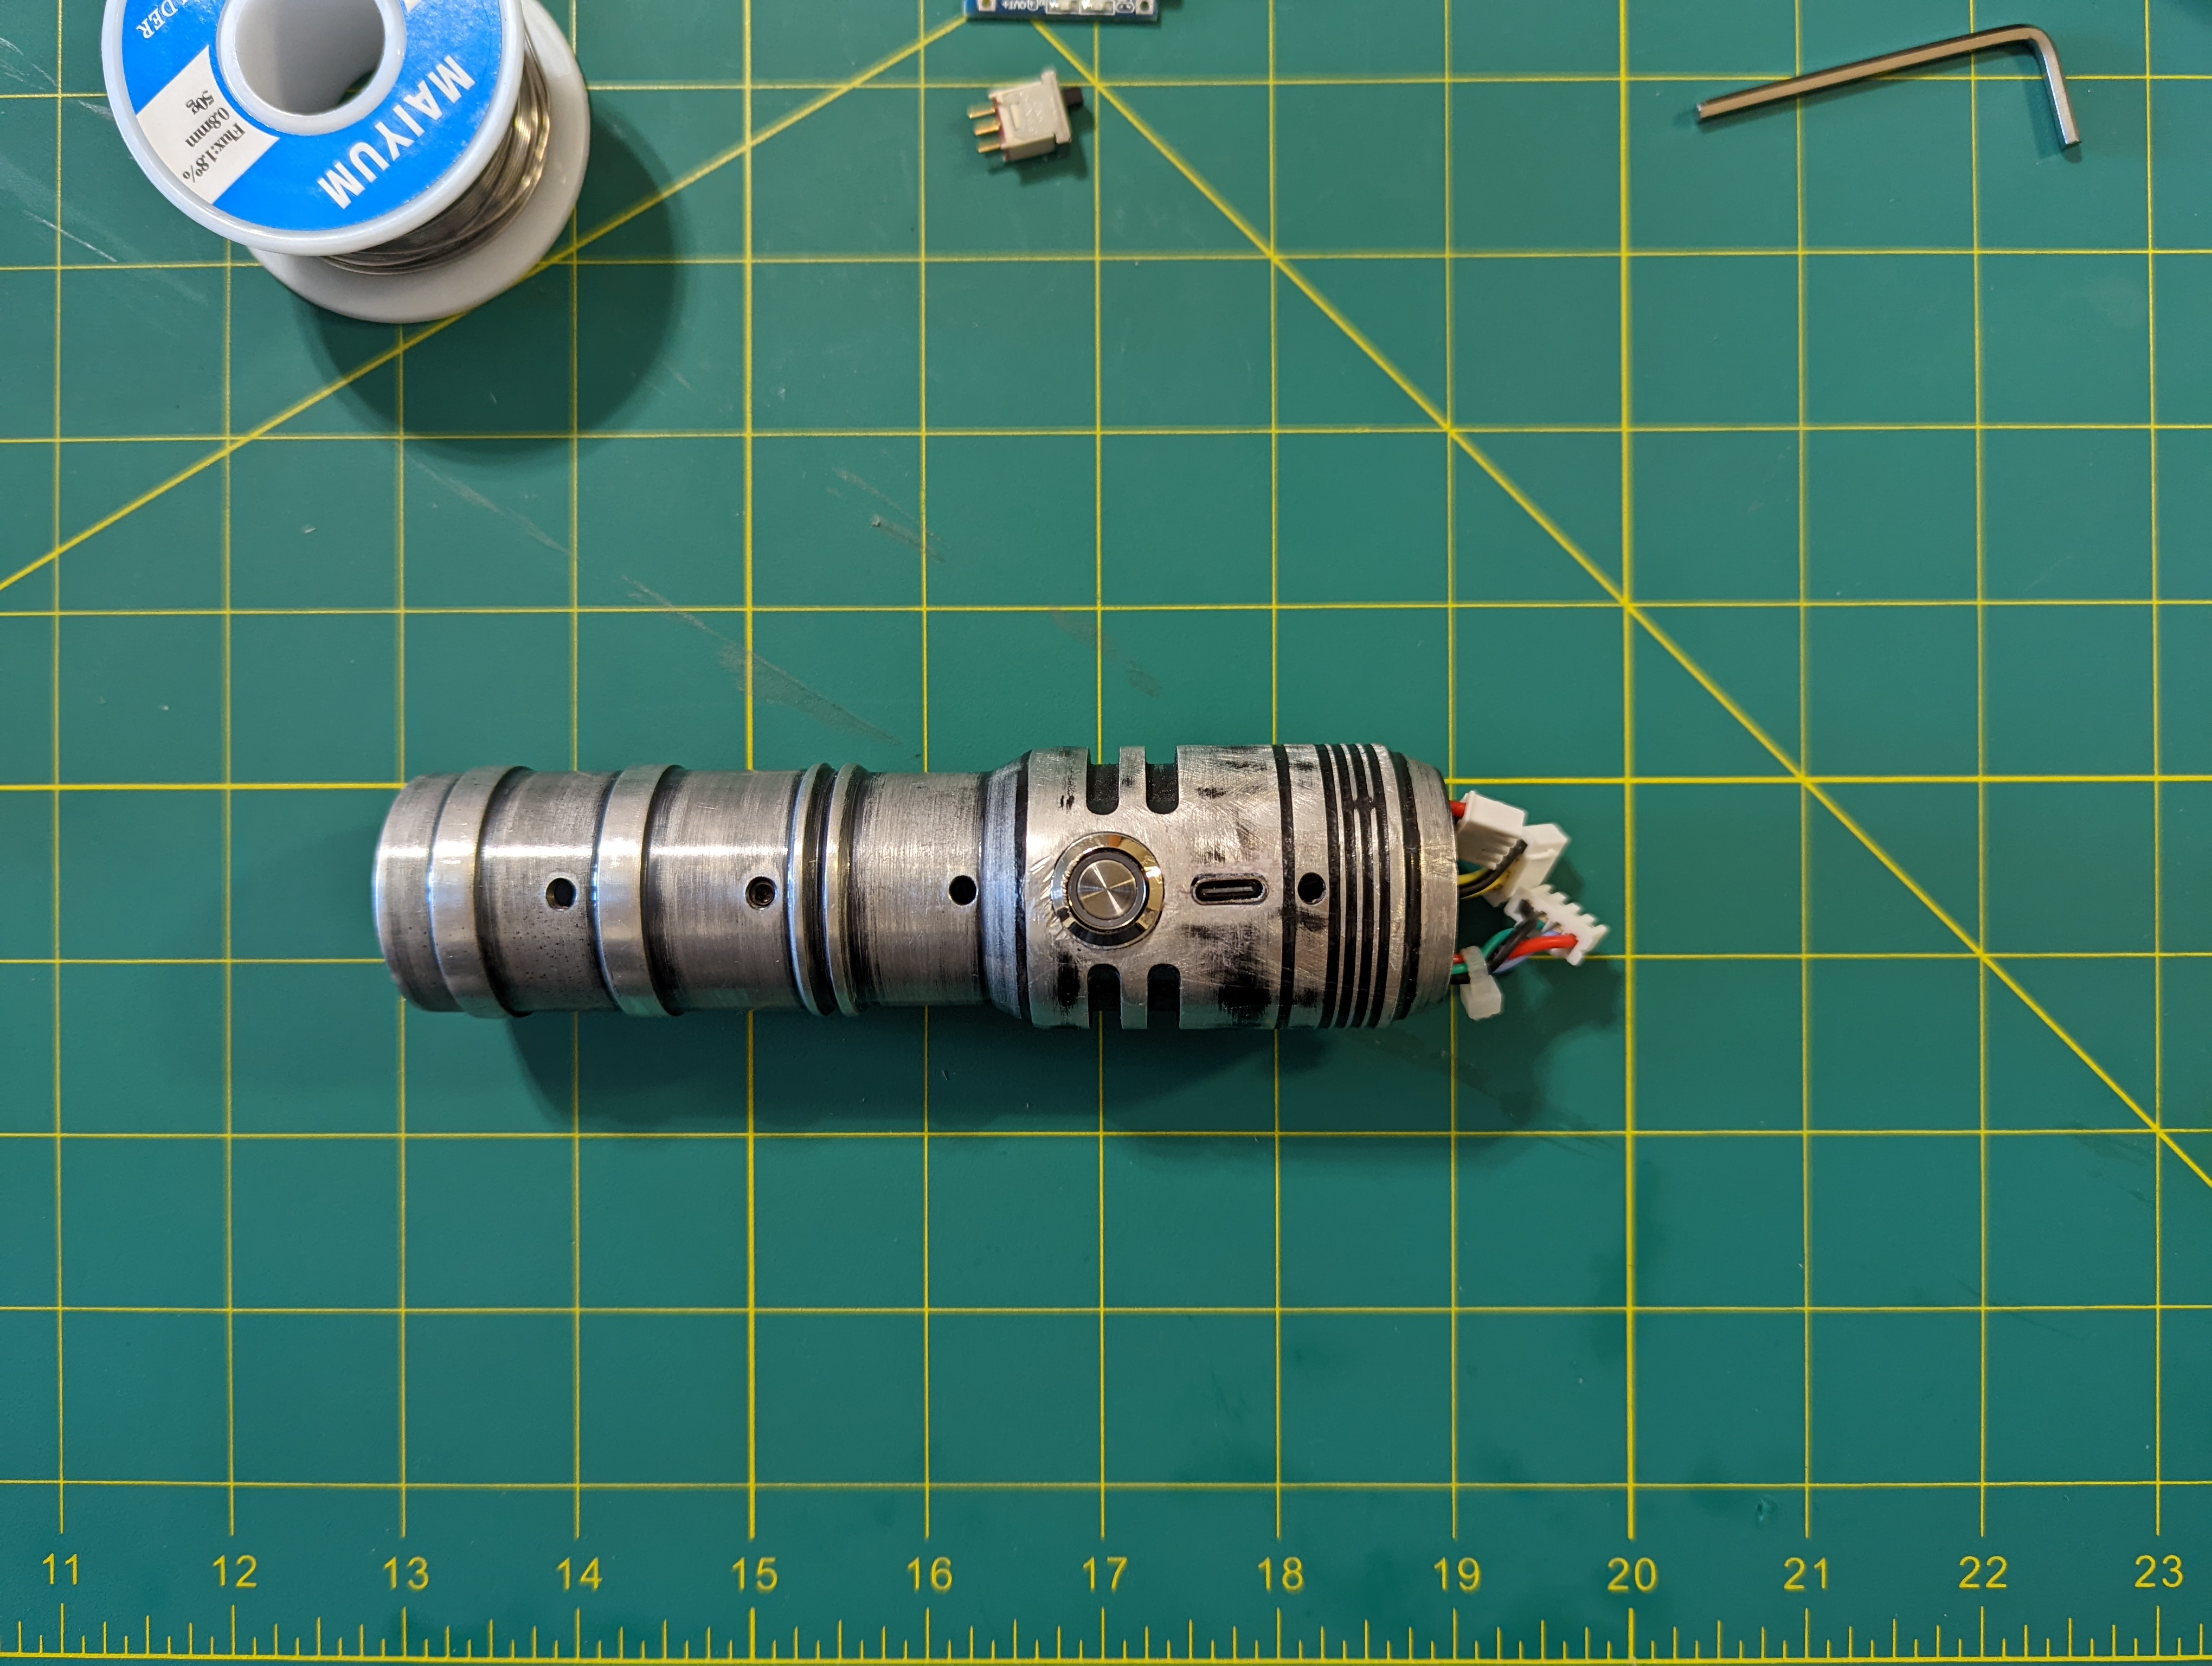
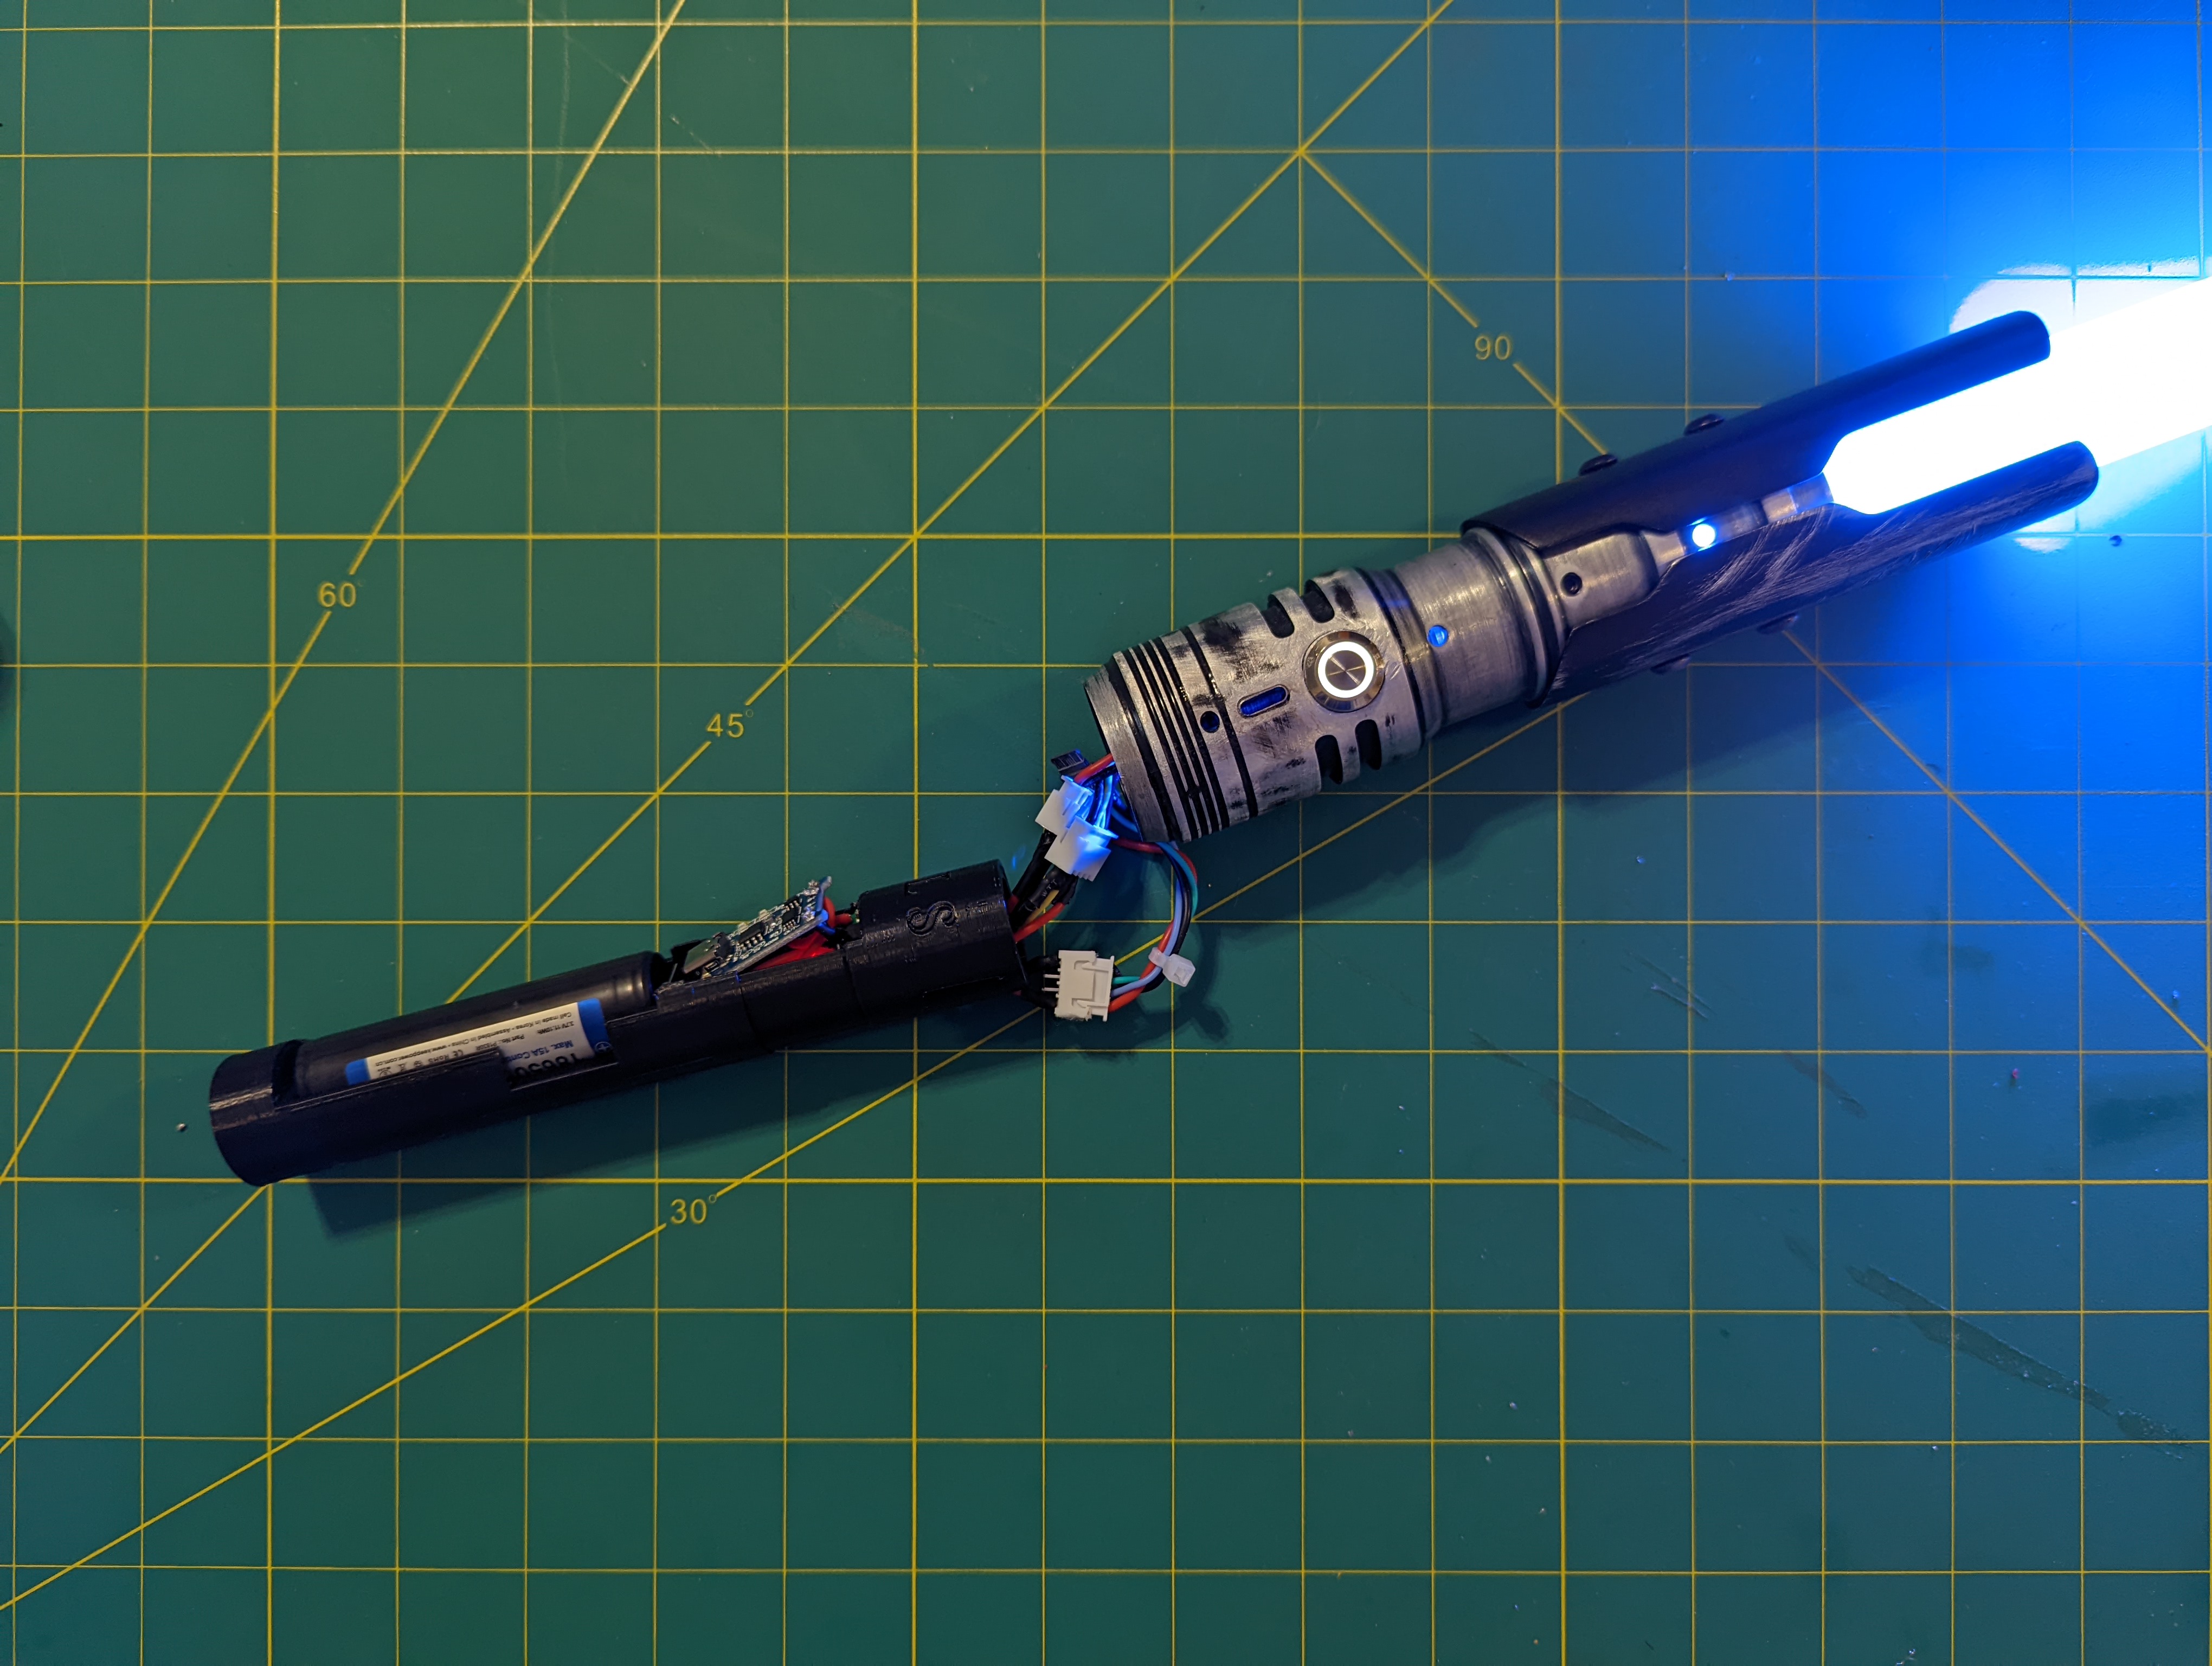
- Connect all the pieces up and huzzah!
- Whoops, the switch’s light turns off randomly sometimes
- Remove the switch’s light wires after lots of finagling. Seems there was just too much stuff in that part of the saber and was causing issues
- Decided the exposed USB port was bad, so ordered and weathered a USB-C cover
- Whoops, the cover pushed the USB header out from the metal container. Some careful crazy glue and maneuvering with tweezers later, it’s reattached
- Also cut down the USB cover to have less material and fit the port better
- But after 20ish hours of sanding and painting and 10ish of electronics, I’m done!
“I’m standing here in pieces, and you’re having delusions of grandeur!”
Here are all the parts I ordered with any relevant notes and pricing.
- Hilt for $80
- Chassis $22
- This worked, but wasn’t very flexible. I will explore the custom saber shop system in the future
- Switch $6
- USB-C Port $4
- 18650 Battery $8
- Blade $20
- Did cut it down to 34in with hacksaw and some more sanding
- USB-C Cover $7
- TP4056 Charging Board $10
- In addition to charging the battery, it also allows saber to work without battery if it’s plugged in
- Leather Wrap $12
- Switch Bezel $8
- Momentary to latching converter $5
- Base LEDs $20
- LED Thermal pad $1
- LED Lens $2
- LED heatsink $10
- .3Ohm Resistor $.5 x2
- Retention Screw $4
- This hilt needed an M4, not the US standard of 8-32
- Total $220
I also had to order some tools (like this super cool open source soldering iron), as well as some things like wire spools, which I’ve not factored into this cost.
“Always in motion the future is”
This was a very rewarding processes. I’ve learned a ton. And now have a totally unique lightsaber of my very own!
My main takeaways for when I (eventually) make another lightsaber:
- Investigate other ways of removing paint aside from manually sanding or get a saber without any paint to start with. That was the biggest time sync of all
- Figure out a better strategy for keeping all the components inside. I like the custom saber shops solution conceptually, but would need to play around with it
- I want my saber to change colors and make “vvhhmmmm” and “whsssh” noises. So I will use a speaker and soundboard next time. There are also NeoPixel adapters that allow you to use a lightsaber made for NeoPixel’s electronic connection with a slightly modified blade. Assuming it works well, it would give the flexibility to use a base-lit lightsaber when you are bashing things and switch to a Neopixel when you aren’t
I hope this has helped! If you have questions, you can reach me at my contact page.
Oh and here are some resources on wiring, soldering, and building sabers that I found useful:
- LED Resistor calculator
- For when you want to be lazy (or when the crippling anxiety tells you everything you do is wrong and needs to be checked)
- Wire Gauge Chart
- As annoying as it might be, you do need thicker wires (22awg in my case) for power delivery than other signals (which could use 30awg)
- Building a basic saber with a momentary switch
- Wiring Parallel/Series Information
- How to do the leather wrap
- How to JST Crimp
- Weathering tutorial
May the Force be with you.
Till next time,
- Matthew Booe
